If you want to make money from your WordPress site, Google AdSense is one of the most popular ways to do it.
With AdSense, you can display ads that are automatically targeted to your website’s content or visitors (thanks to retargeting). The latter feature is especially useful because, even if your website’s content isn’t especially monetizable, you can still earn money by displaying retargeting ads that are contextual to each visitor.
However, if you want to effectively use AdSense on WordPress, you’ll benefit from the help of some of the WordPress AdSense plugins in this post.
With AdSense plugins, you’ll be able to:
- automatically insert ad blocks at different parts of your site (or use Auto Ads)
- target ads to certain types of WordPress content or user roles
- rotate ads (useful if you want to try non-AdSense ads, too)
- view basic click/impression stats (which enables A/B testing)
- display different ads based on location, device, and so on.
In this post, I’ll share the four best AdSense plugins for WordPress, and then I’ll show you how to add AdSense to WordPress using one of the most popular options (though the same basic approach will work for all of these plugins).
Want to jump straight to the tutorial? Click here 👈
Four Best WordPress AdSense Plugins
1. Ad Inserter
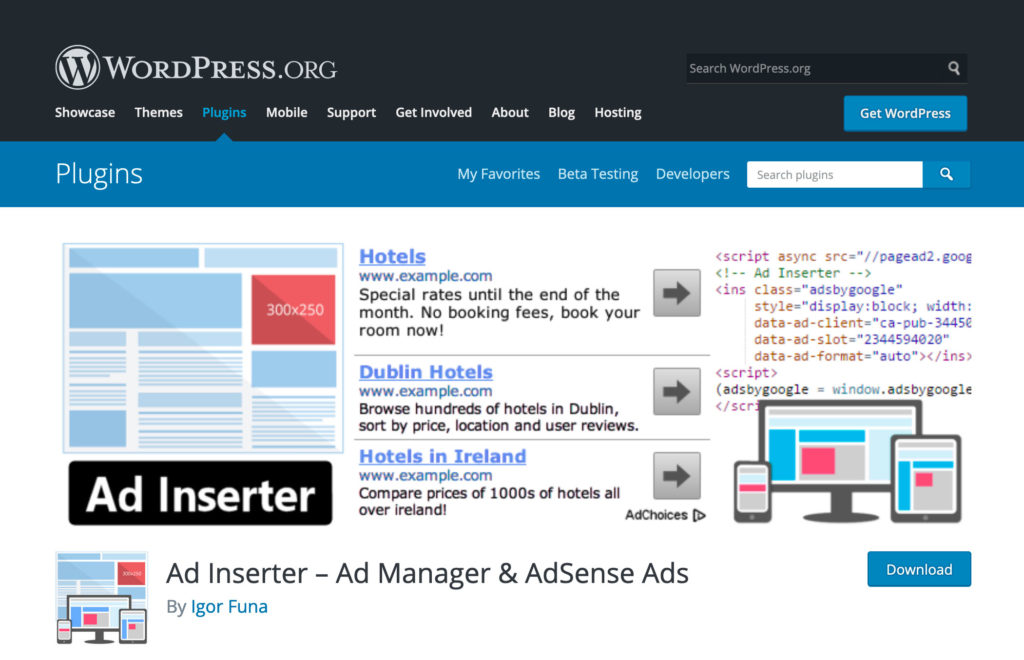
By the numbers, Ad Inserter is the most popular ad manager plugin at WordPress.org. It’s active on more than 300,000 sites, while maintaining a near-perfect 4.9-star rating on more than 1,350 reviews.
This is also the AdSense plugin that I use myself, so I can put some personal experience behind this recommendation.
In a nutshell, Ad Inserter makes it easy to insert any ad, including AdSense, anywhere on your site. It comes with tons of pre-set locations where you can automatically inject ads, including before or after:
- post
- content
- certain # paragraph (e.g. the third paragraph) or before/after a random paragraph
- image
- comments
- specific CSS selectors.
You can also manually place ads using a shortcode or PHP function.
In terms of AdSense-specific features, it includes a tool to help you to view and insert your AdSense ad units from inside your WordPress dashboard. It also helps you to comply with the AdSense terms of service, with settings that help you to avoid displaying AdSense ads too close to images or headers. You can also use Ad Inserter to edit your ads.txt file, which is another important tool to stay compliant with AdSense.
If you want to do more than just inject ads, the plugin also includes options to analyze and refine how your ads work, though many of these features are only available in the paid version:
- Click and impression analytics (paid).
- Ad rotation — combined with analytics, this basically lets you run A/B tests.
- Ad blocker detection (paid).
- Geotargeting (paid).
- Device detection — e.g. show/hide ads for just mobile users.
- Sticky ads — this is against the AdSense TOS, but it’s useful for other types of ads (paid).
Later in this post, I’ll show you step-by-step how to use Ad Inserter to add AdSense to WordPress.
Price: The free version is available at WordPress.org. The paid version starts at €20.
2. Advanced Ads
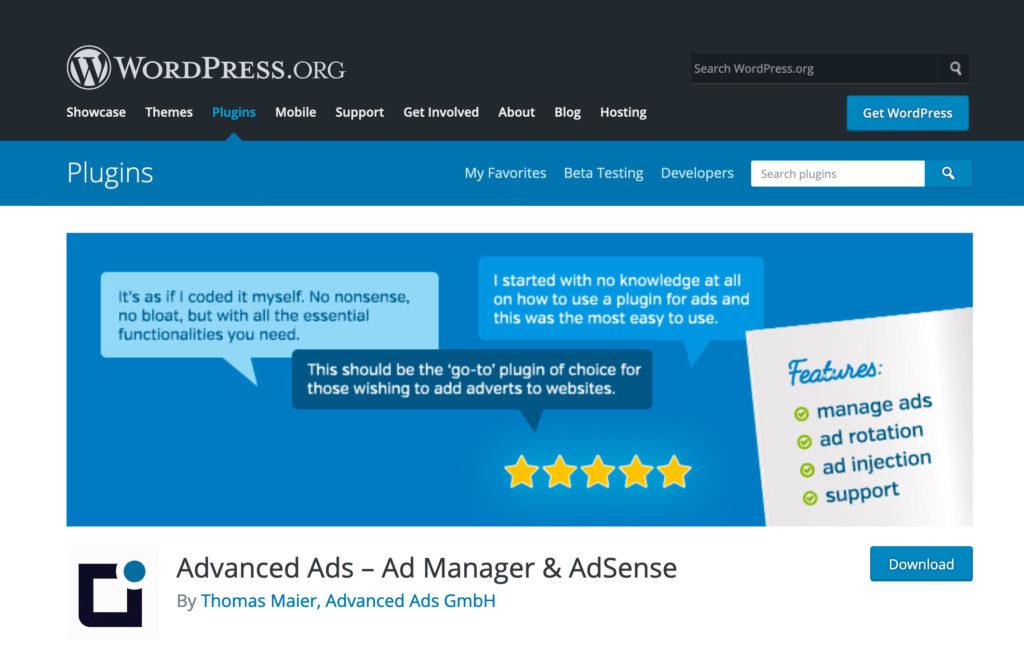
Advanced Ads is another popular and well-rated ad manager plugin at WordPress.org. It’s active on more than 100,000 sites, and also has a near-perfect 4.9-star rating on almost a thousand reviews.
It offers a lot of the same features as Ad Inserter. I’ve used both, and they’re both great plugins. Basically, I don’t think you’ll go wrong with either — it mainly just comes down to your interface preference, although Ad Inserter also offers more features in its free version.
As with Ad Inserter, you can automatically inject AdSense ads at certain locations on your site, including before/after:
- a specific paragraph
- post content
- footer.
Beyond that, you can target your ads to specific content, such as a certain category, tag, post type, and so on.
For even more control, you can also manually place ads with shortcodes, widgets or PHP functions.
Full list of placement options.
You can also show/hide your ads based on visitor conditions. Here are some of the most notable conditions:
- Device — e.g. show for desktop visitors but hide for mobile visitors.
- Logged-in status — e.g. show for anonymous visitors but not for registered users.
- Referring URL.
- Browser and/or browser language.
- Geolocation (paid).
- WordPress user role or capability (paid).
Advanced Ads also has plenty of AdSense-specific features. It can help you to connect to your AdSense account to easily insert ads and even view your AdSense earnings from your WordPress dashboard.
It also includes tools to help you to comply with AdSense’s policies, such as an ads.txt editor, and options to hide ads on 404 pages and other areas that violate the TOS.
In terms of AdSense-specific features, I think Advanced Ads offers a little bit more than Ad Inserter, so it may be a reason to choose it if you want to, for example, view AdSense earnings from your WordPress dashboard.
Price: The free version is available at WordPress.org. The core paid version starts at €39, but there are also some additional paid add-ons.
3. WP QUADS
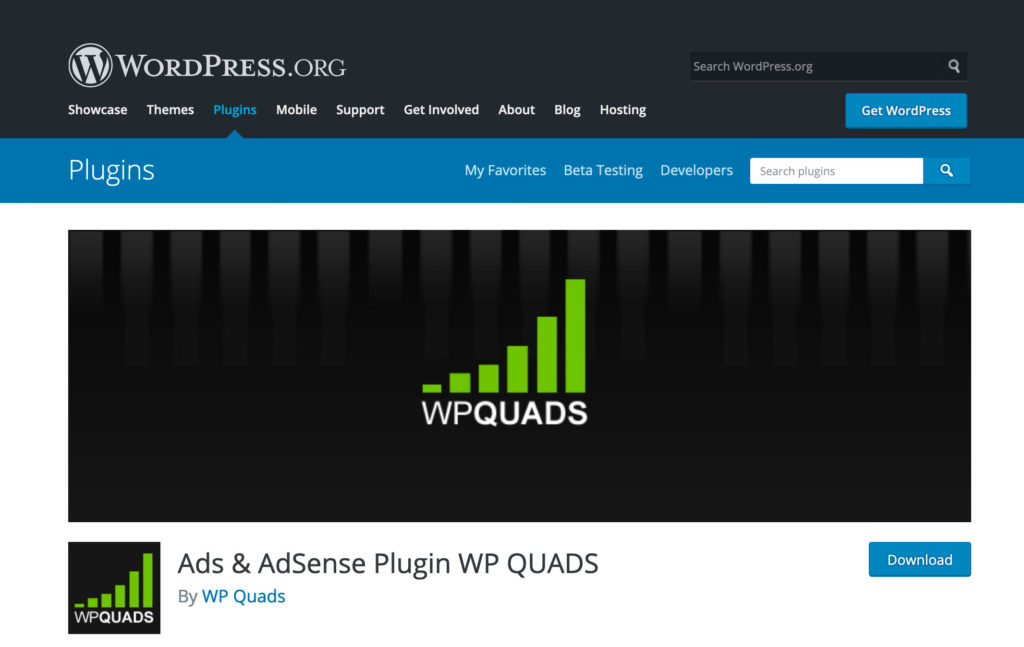
WP QUADS is a fork of the popular Quick AdSense plugin. Quick AdSense is still active, but it has some reliability problems, which is why I’m featuring WP QUADS instead (because WP QUADS has fixed all of those issues).
Unlike the previous two plugins, WP QUADS is mostly focused on just AdSense, although you can still use it to insert other ads if you want.
When you create an ad, WP QUADS has a tool to help you to generate the proper ad code. Then, you can choose where to display your ads.
You don’t get quite as many options as the previous two plugins, but you still have plenty of control:
- Beginning of post.
- Middle of post.
- End of post.
- After the ‘more’ tag.
- Before the last paragraph.
- After X paragraphs.
- After an image.
You can also use include/exclude rules to target your ads to specific content or users. You can target post types, taxonomies (categories and tags), and post formats. There’s also an option that lets you target a user’s logged-in status.
With the premium version, you can also target your ads to specific devices.
Finally, WP QUADS can help you to create an ads.txt file, and it also includes a useful feature that lets you set an overall max limit for the number of ads per page.
Overall, WP QUADS doesn’t give you quite as many features as Ad Inserter or Advanced Ads, but it’s also a little more streamlined, which some users may prefer.
Price: The free version is available at WordPress.org. The paid version is pricey in comparison with other plugins, starting at $89.
4. Site Kit
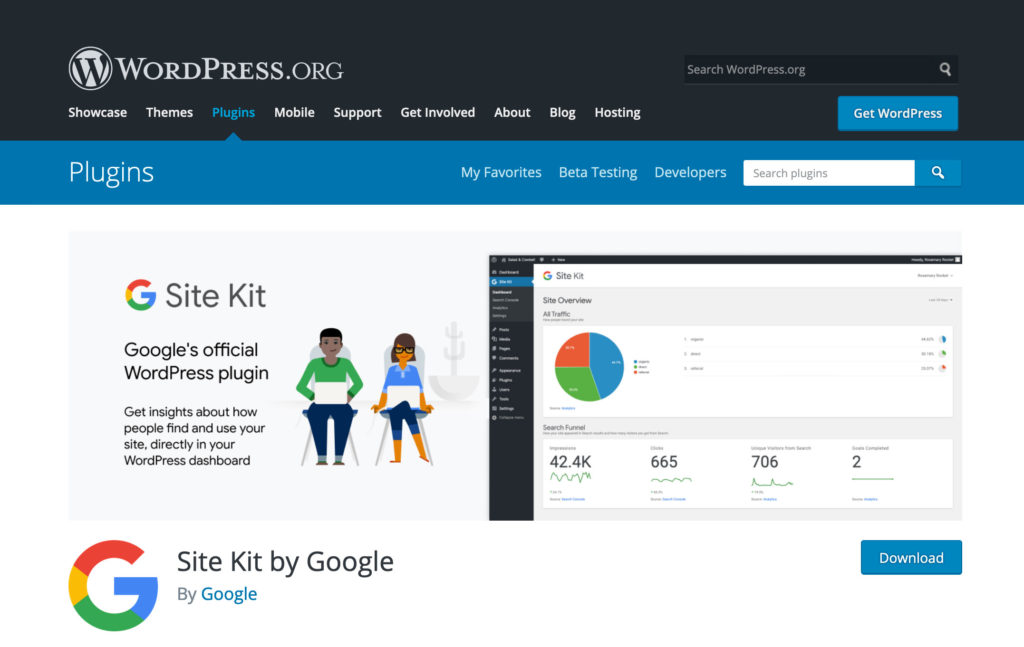
Site Kit is an official plugin from Google that helps you to connect to six different Google services:
- AdSense (obviously!)
- Analytics
- Search Console
- PageSpeed Insights
- Tag Manager
- Optimize
For this post, I’ll focus exclusively on Site Kit’s AdSense features — just remember that it does also have those other integrations, which is nice because you’re probably using at least Google Analytics and Search Console.
In terms of the AdSense integration, Site Kit offers the following features:
- Verify your website with AdSense.
- View your AdSense earnings inside your WordPress dashboard.
- Automatically display ads with Google Auto Ads.
However, it does not let you manually place ads at specific parts of your site. Instead, you’ll need to rely on Auto Ads, which uses machine learning to display ads at optimal locations on your site.
Overall, the most unique things about Site Kit are that:
- You can see your AdSense earnings inside your WordPress dashboard.
- You never need to interact with AdSense code snippets.
- It comes straight from Google.
- You can connect to other Google services, such as Google Analytics.
If you value those factors over the ability to manually place ads, Site Kite might be right for you.
However, in terms of injecting ads, a plugin such as Ad Inserter or Advanced Ads will give you more control over exactly where to insert AdSense on your WordPress site.
Price: Site Kit is 100% free and available at WordPress.org.
How to Add AdSense to WordPress With Ad Inserter
There are two high-level approaches to displaying AdSense ads on WordPress:
- You can manually place the ads at specific parts of your site, which is a big part of what the plugins above help you to accomplish. This gives you 100% control over where/when you display ads.
- You can let Google handle placement for you via its Auto Ads option. Google will automatically suggest and use multiple positions, but you still have veto power if you don’t like a specific placement.
I’ll start by showing you how to manually place AdSense ads using the Ad Inserter plugin from above. Then, I’ll circle back and tell you how you can use AdSense Auto Ads on WordPress as well.
Additionally, if you prefer a different plugin, you should still be able to follow this tutorial, as many of the steps are the same — regardless of which AdSense plugin you’re using.
To get started, be sure to install and activate the free Ad Inserter plugin from WordPress.org.
1. Verify Your WordPress Site With AdSense
Before you can start displaying ads, you need to verify your WordPress site with AdSense.
To do that, open your AdSense account (or sign up if you haven’t already), then click on the Sites tab in the sidebar on the left, and then click the Add Site button.
You’ll need to enter the URL to your site, then Google will display a code snippet that you need to add to every page of your WordPress site:
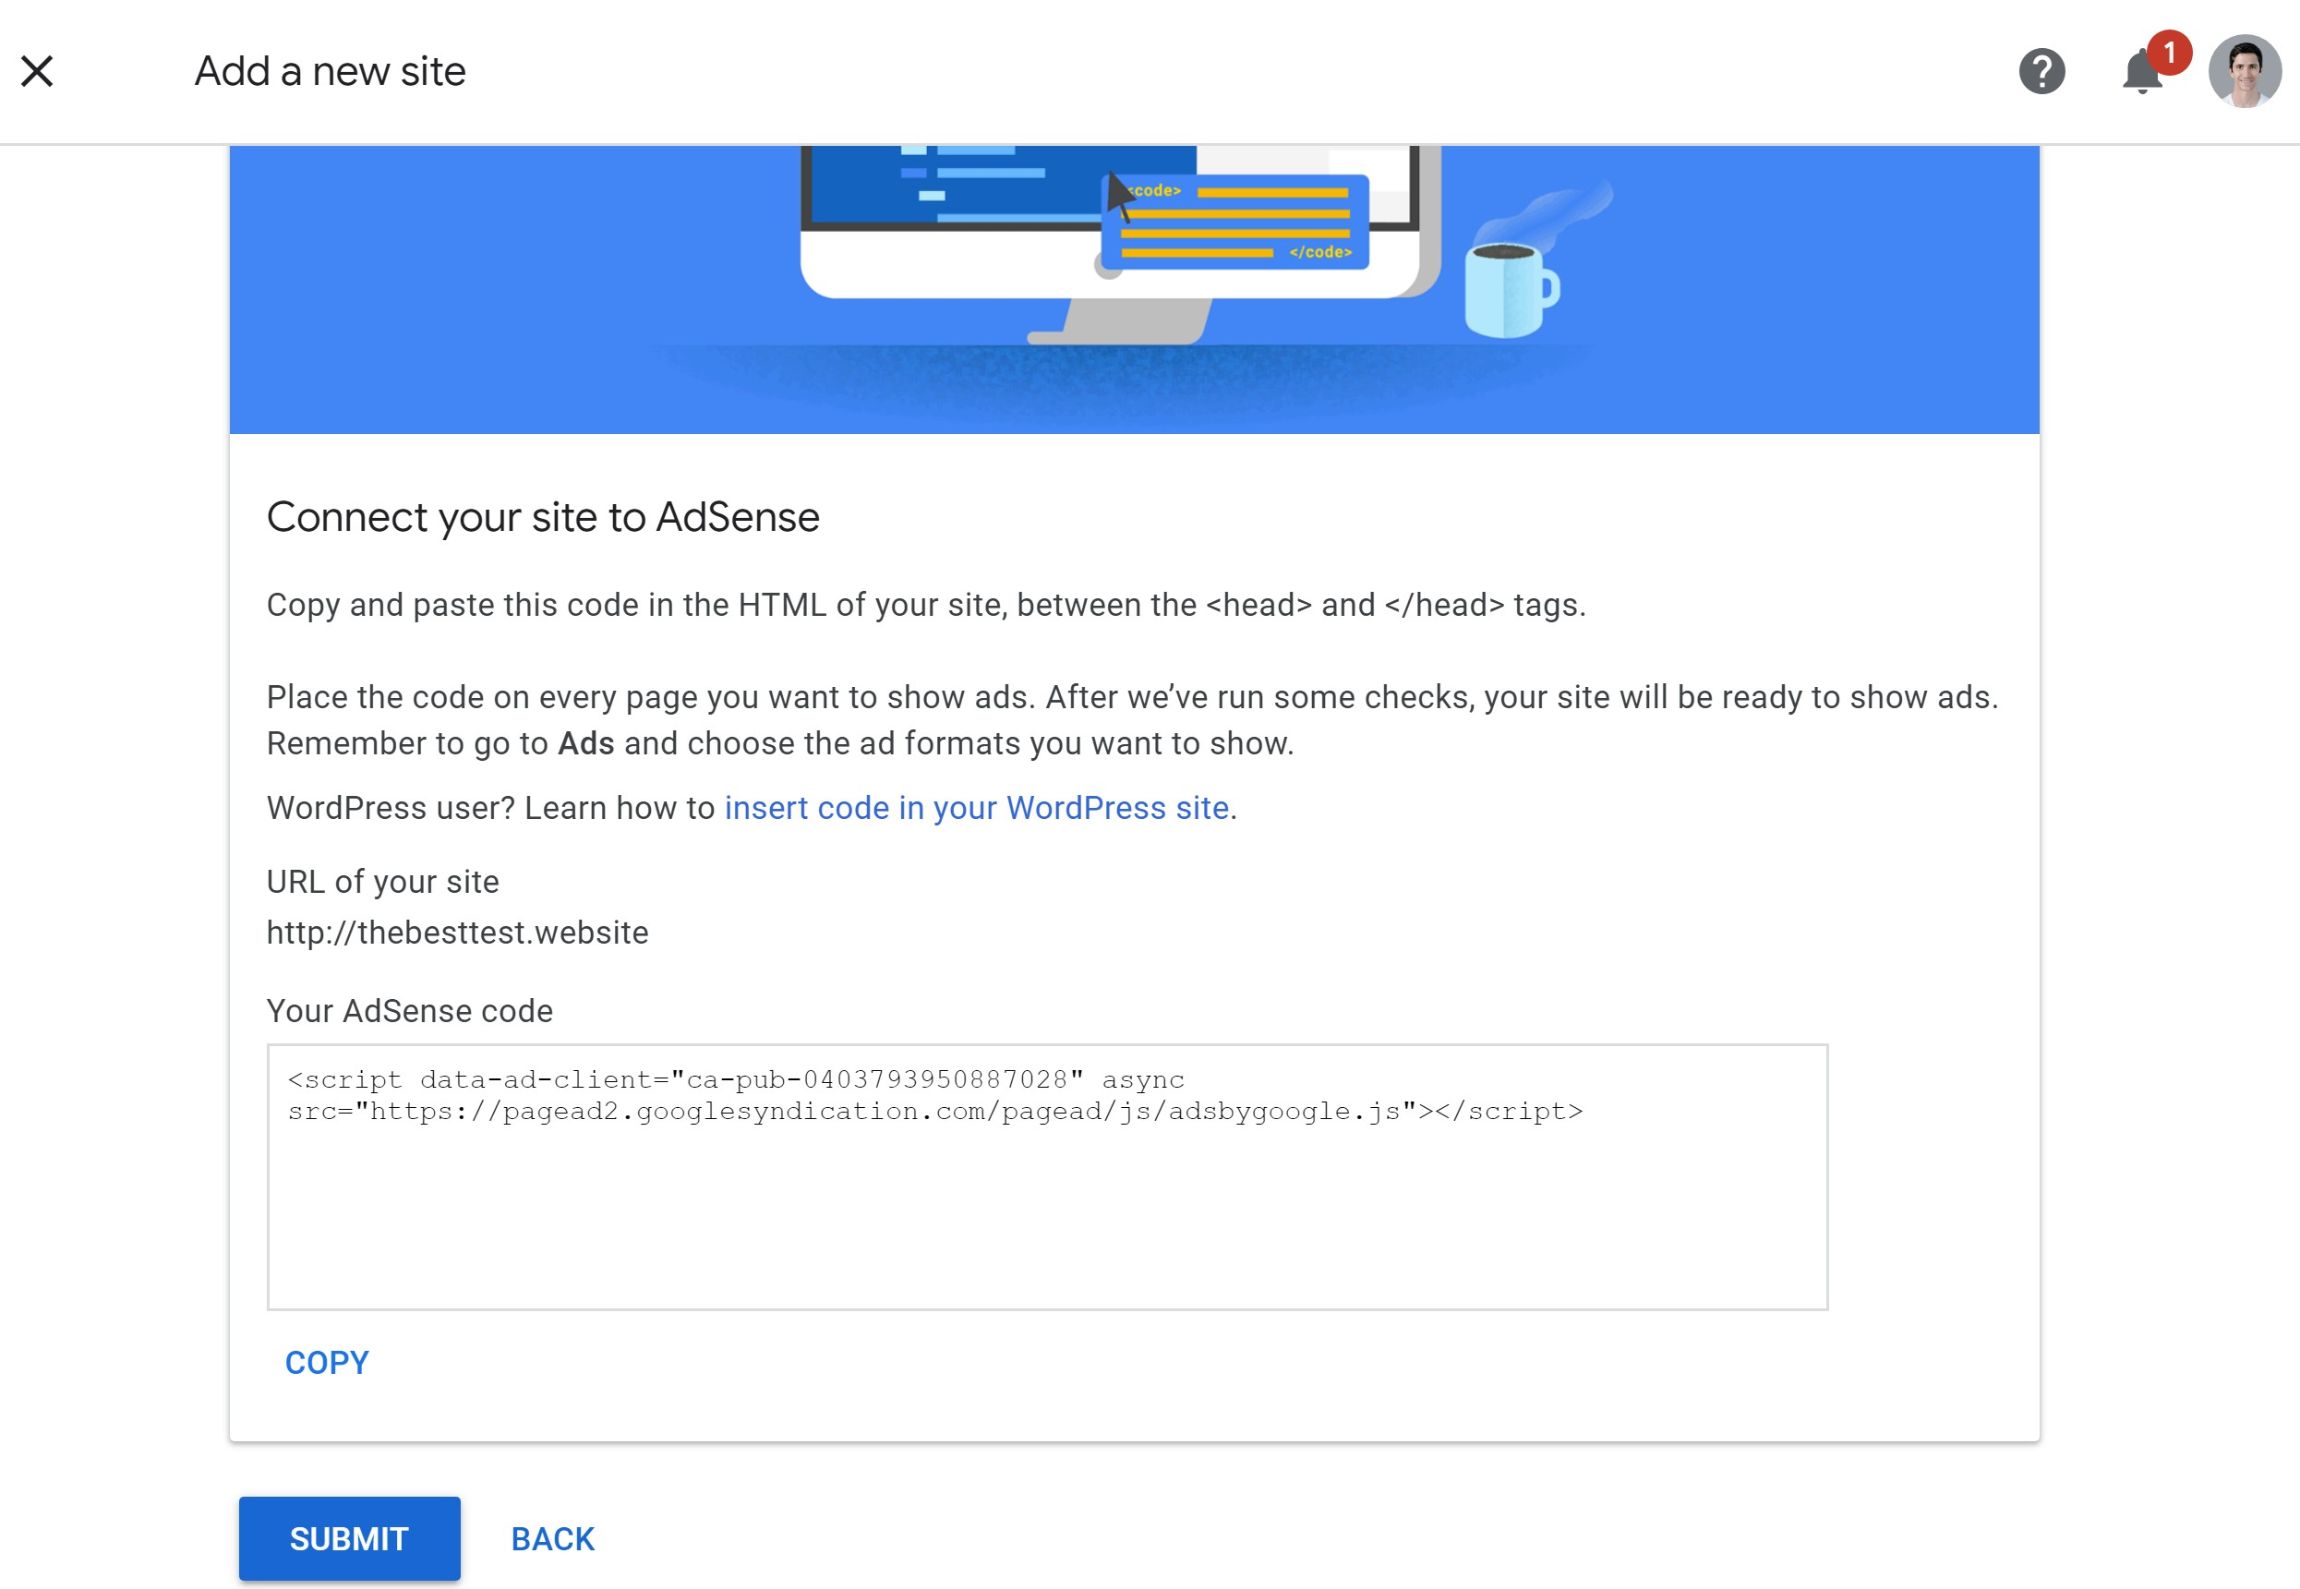
The Ad Inserter plugin can help you to properly add this code snippet.
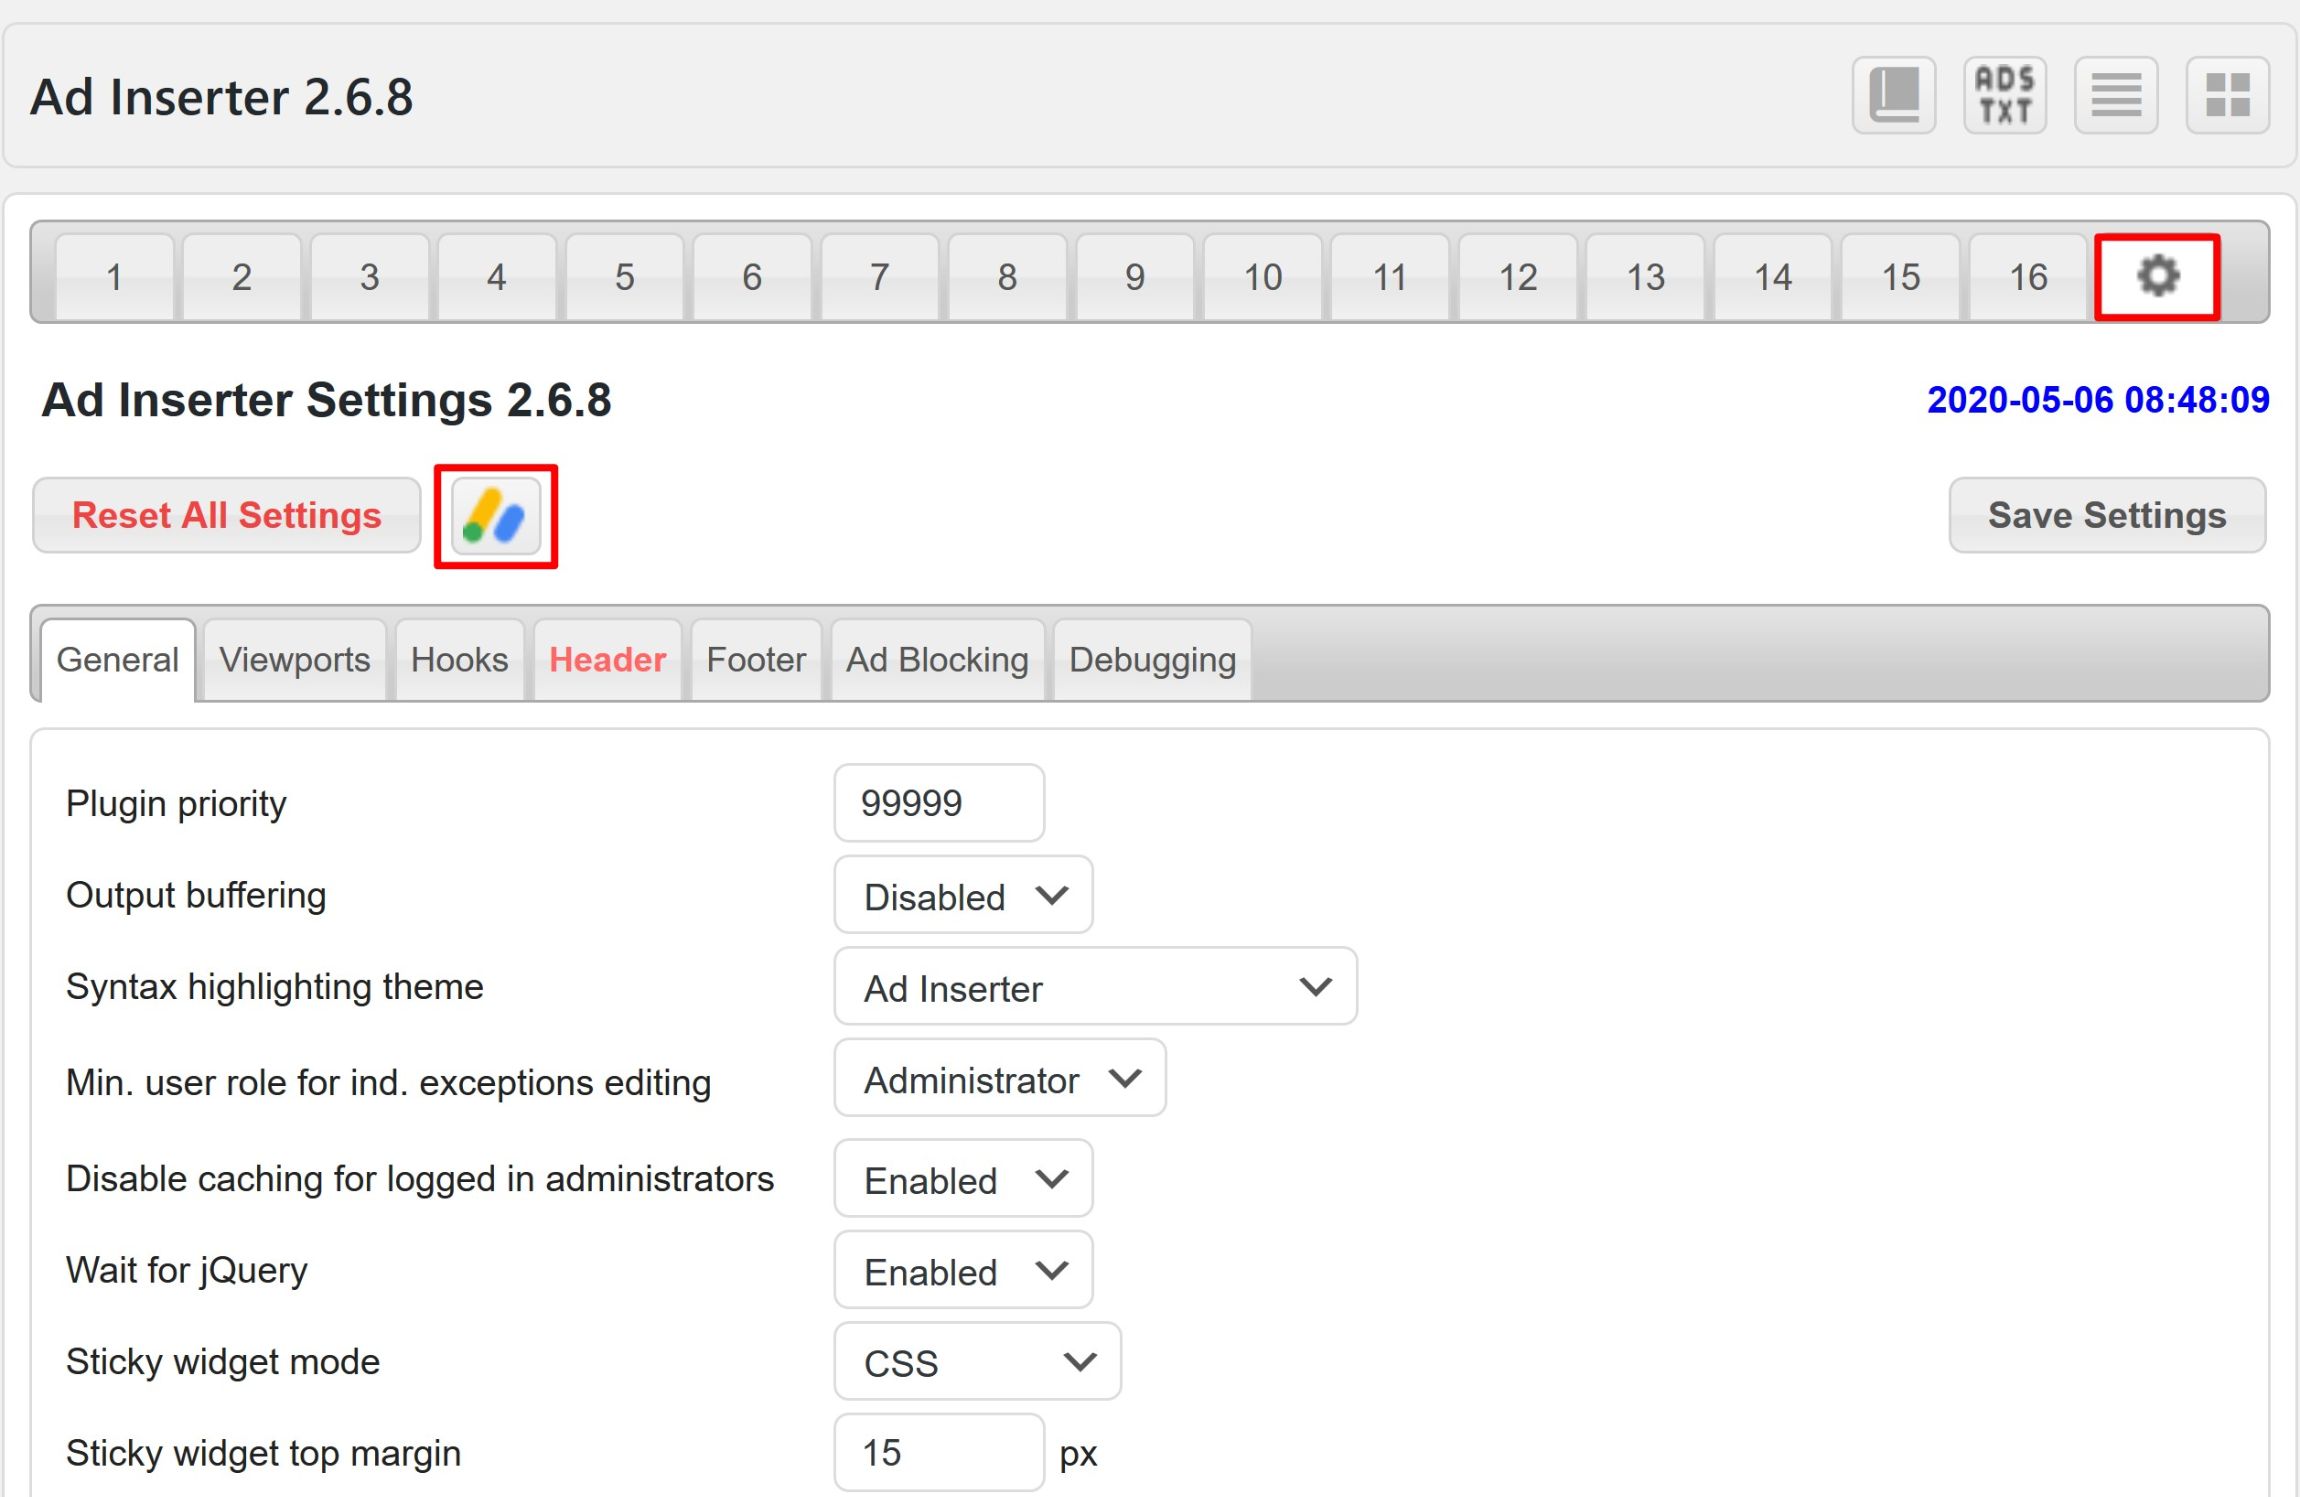
Open your WordPress dashboard, then go to Settings → Ad Inserter. Click on the gear icon to open the Ad Inserter settings, then go to the Header tab in the settings, and paste in the verification code from AdSense:

Then, make sure to click Save Settings.
2. Set Up Ad Inserter AdSense Integration
While you could now start using Ad Inserter to inject the code snippets you get from the AdSense interface, Ad Inserter also includes its own integration to help you to easily insert ads without needing to work with code snippets directly.
Essentially, this feature lets you import and sync with all of your ad blocks
To turn on this feature, go back to the Ad Inserter settings (by clicking the gear icon) and click the AdSense logo to enable the feature (you should see the logo show color when it’s enabled):
Now, go back to your first ad block (click the number 1) and scroll down to the Ad Inserter AdSense Integration box. Next, click the Get Authorization Code button:
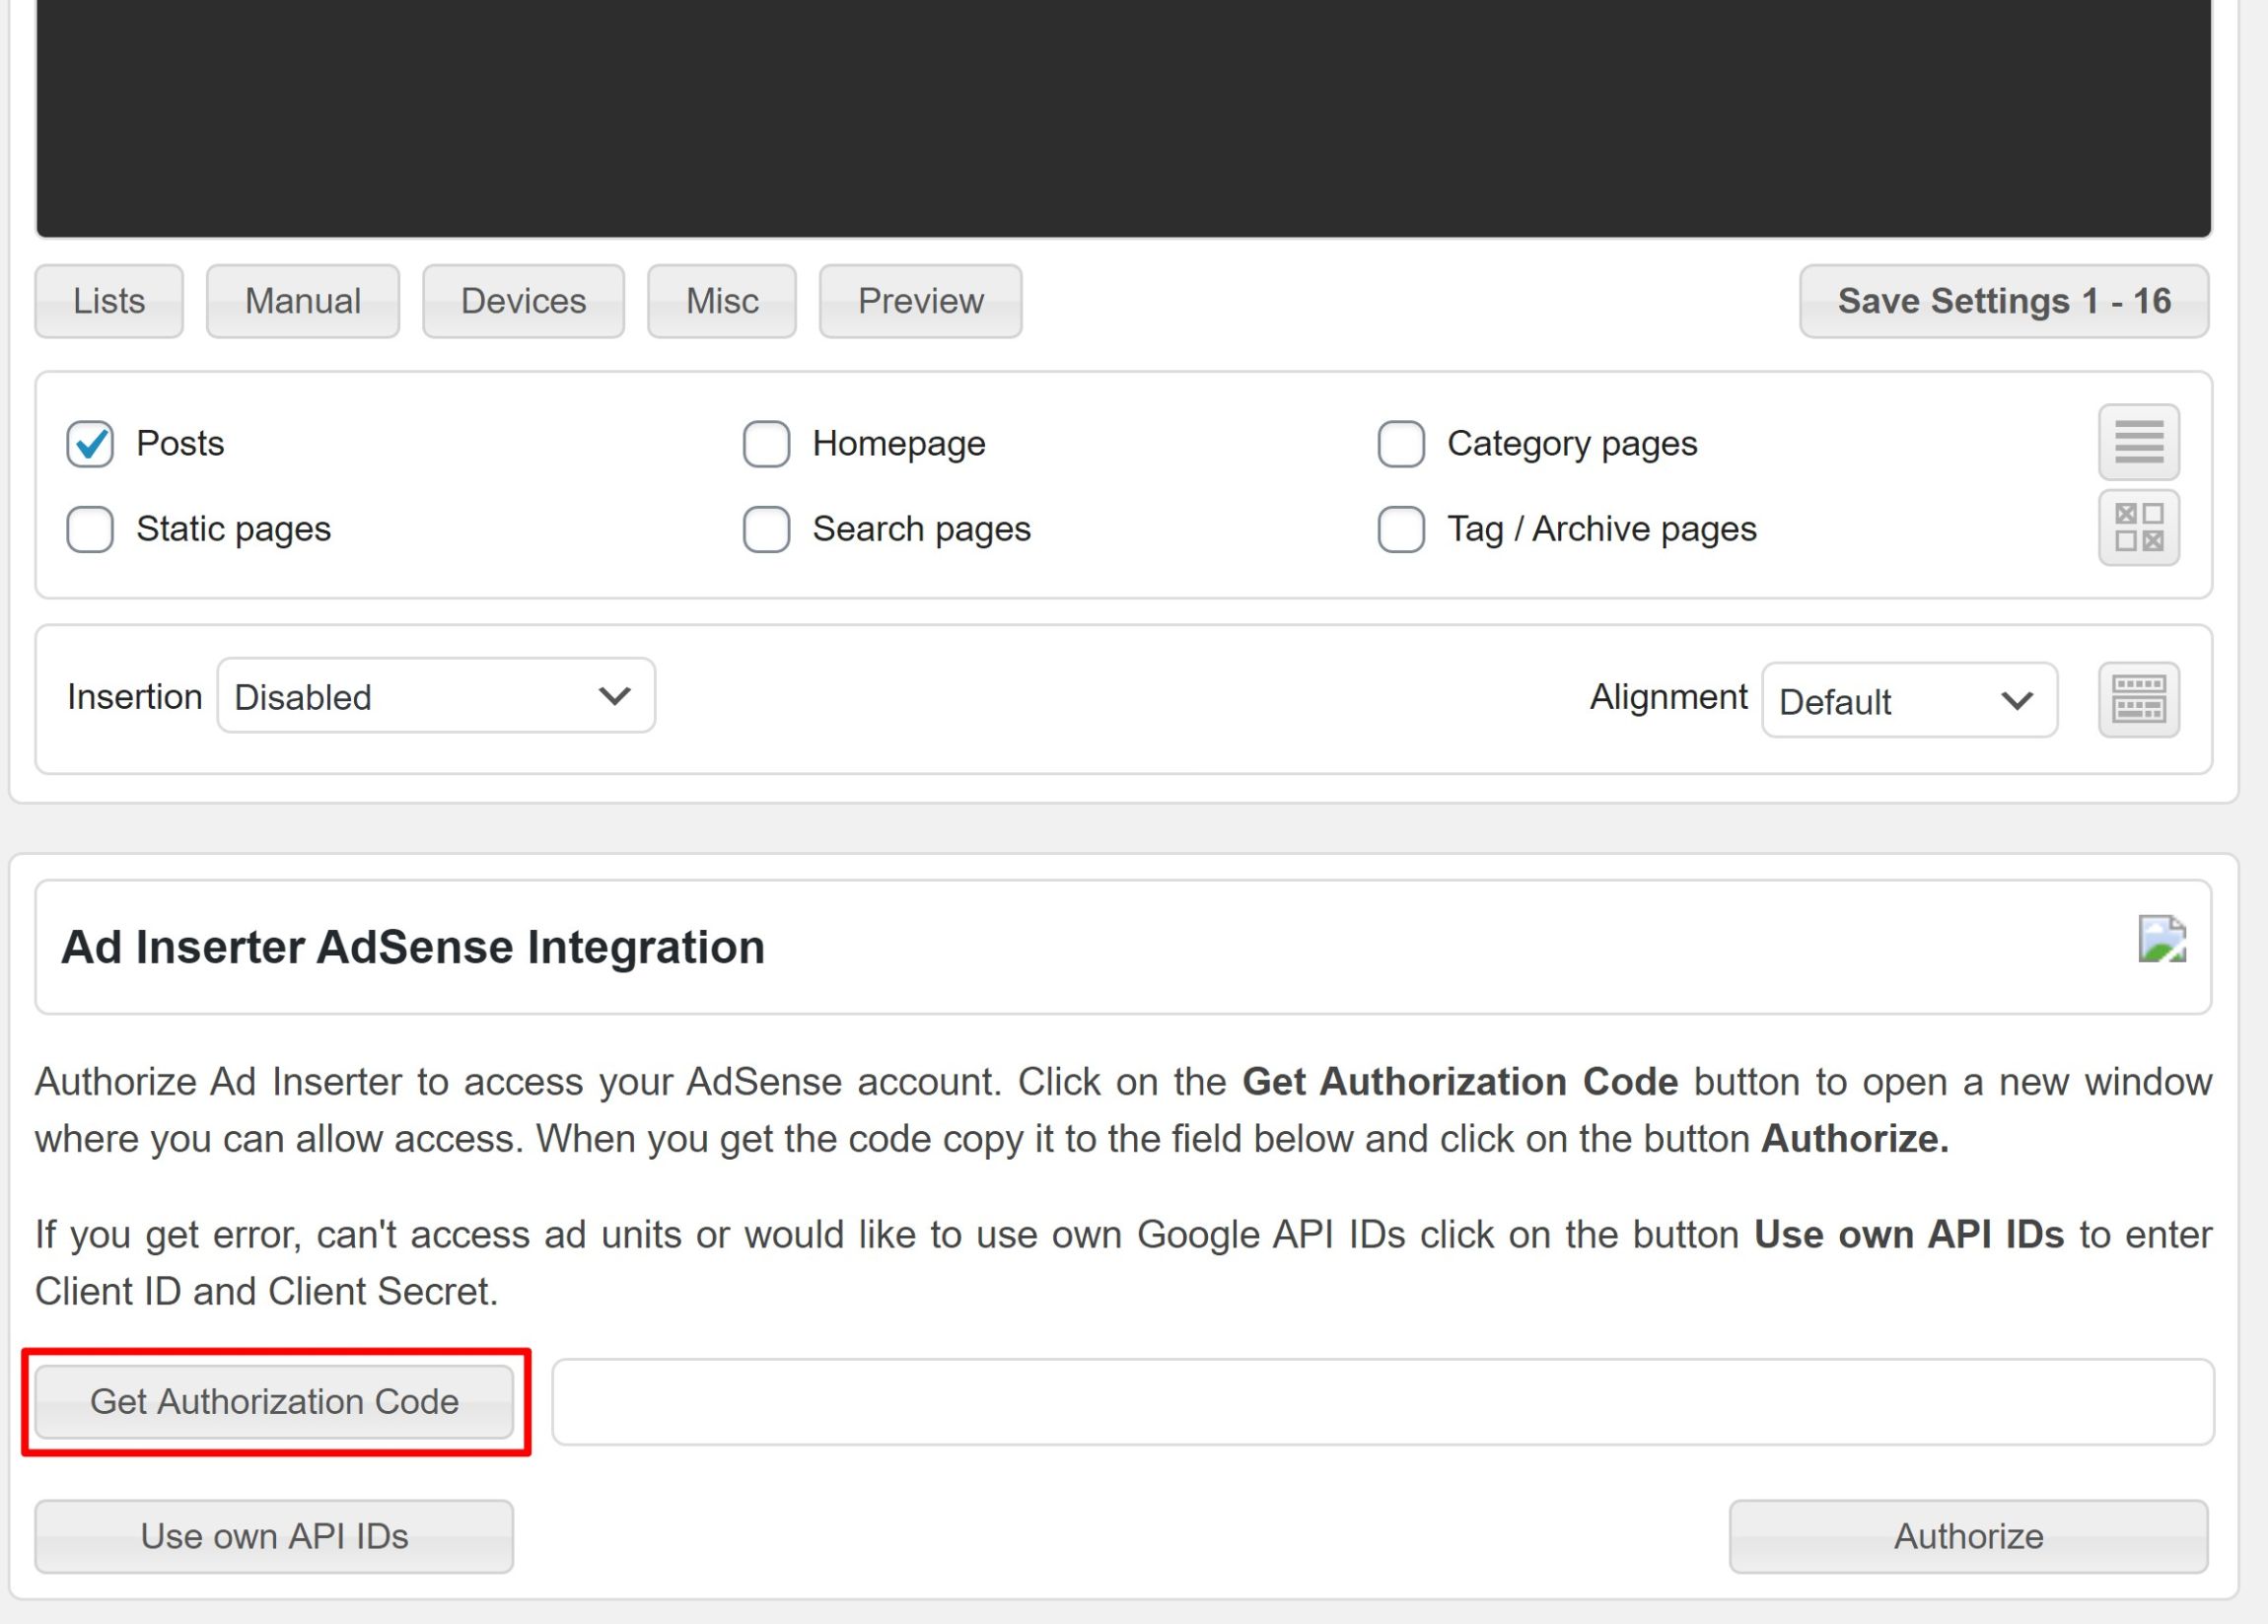
This will take you through the Google authorization process. You’ll need to give Ad Inserter the ability to ‘View and manage your AdSense data’.
Once you’ve done that, Google will display a code snippet that you need to add to the Ad Inserter interface. Then, click Authorize to finish setting up the integration.
3. Create an Ad Unit in AdSense
Next, you need to create an AdSense ad unit to fill your manual placement.
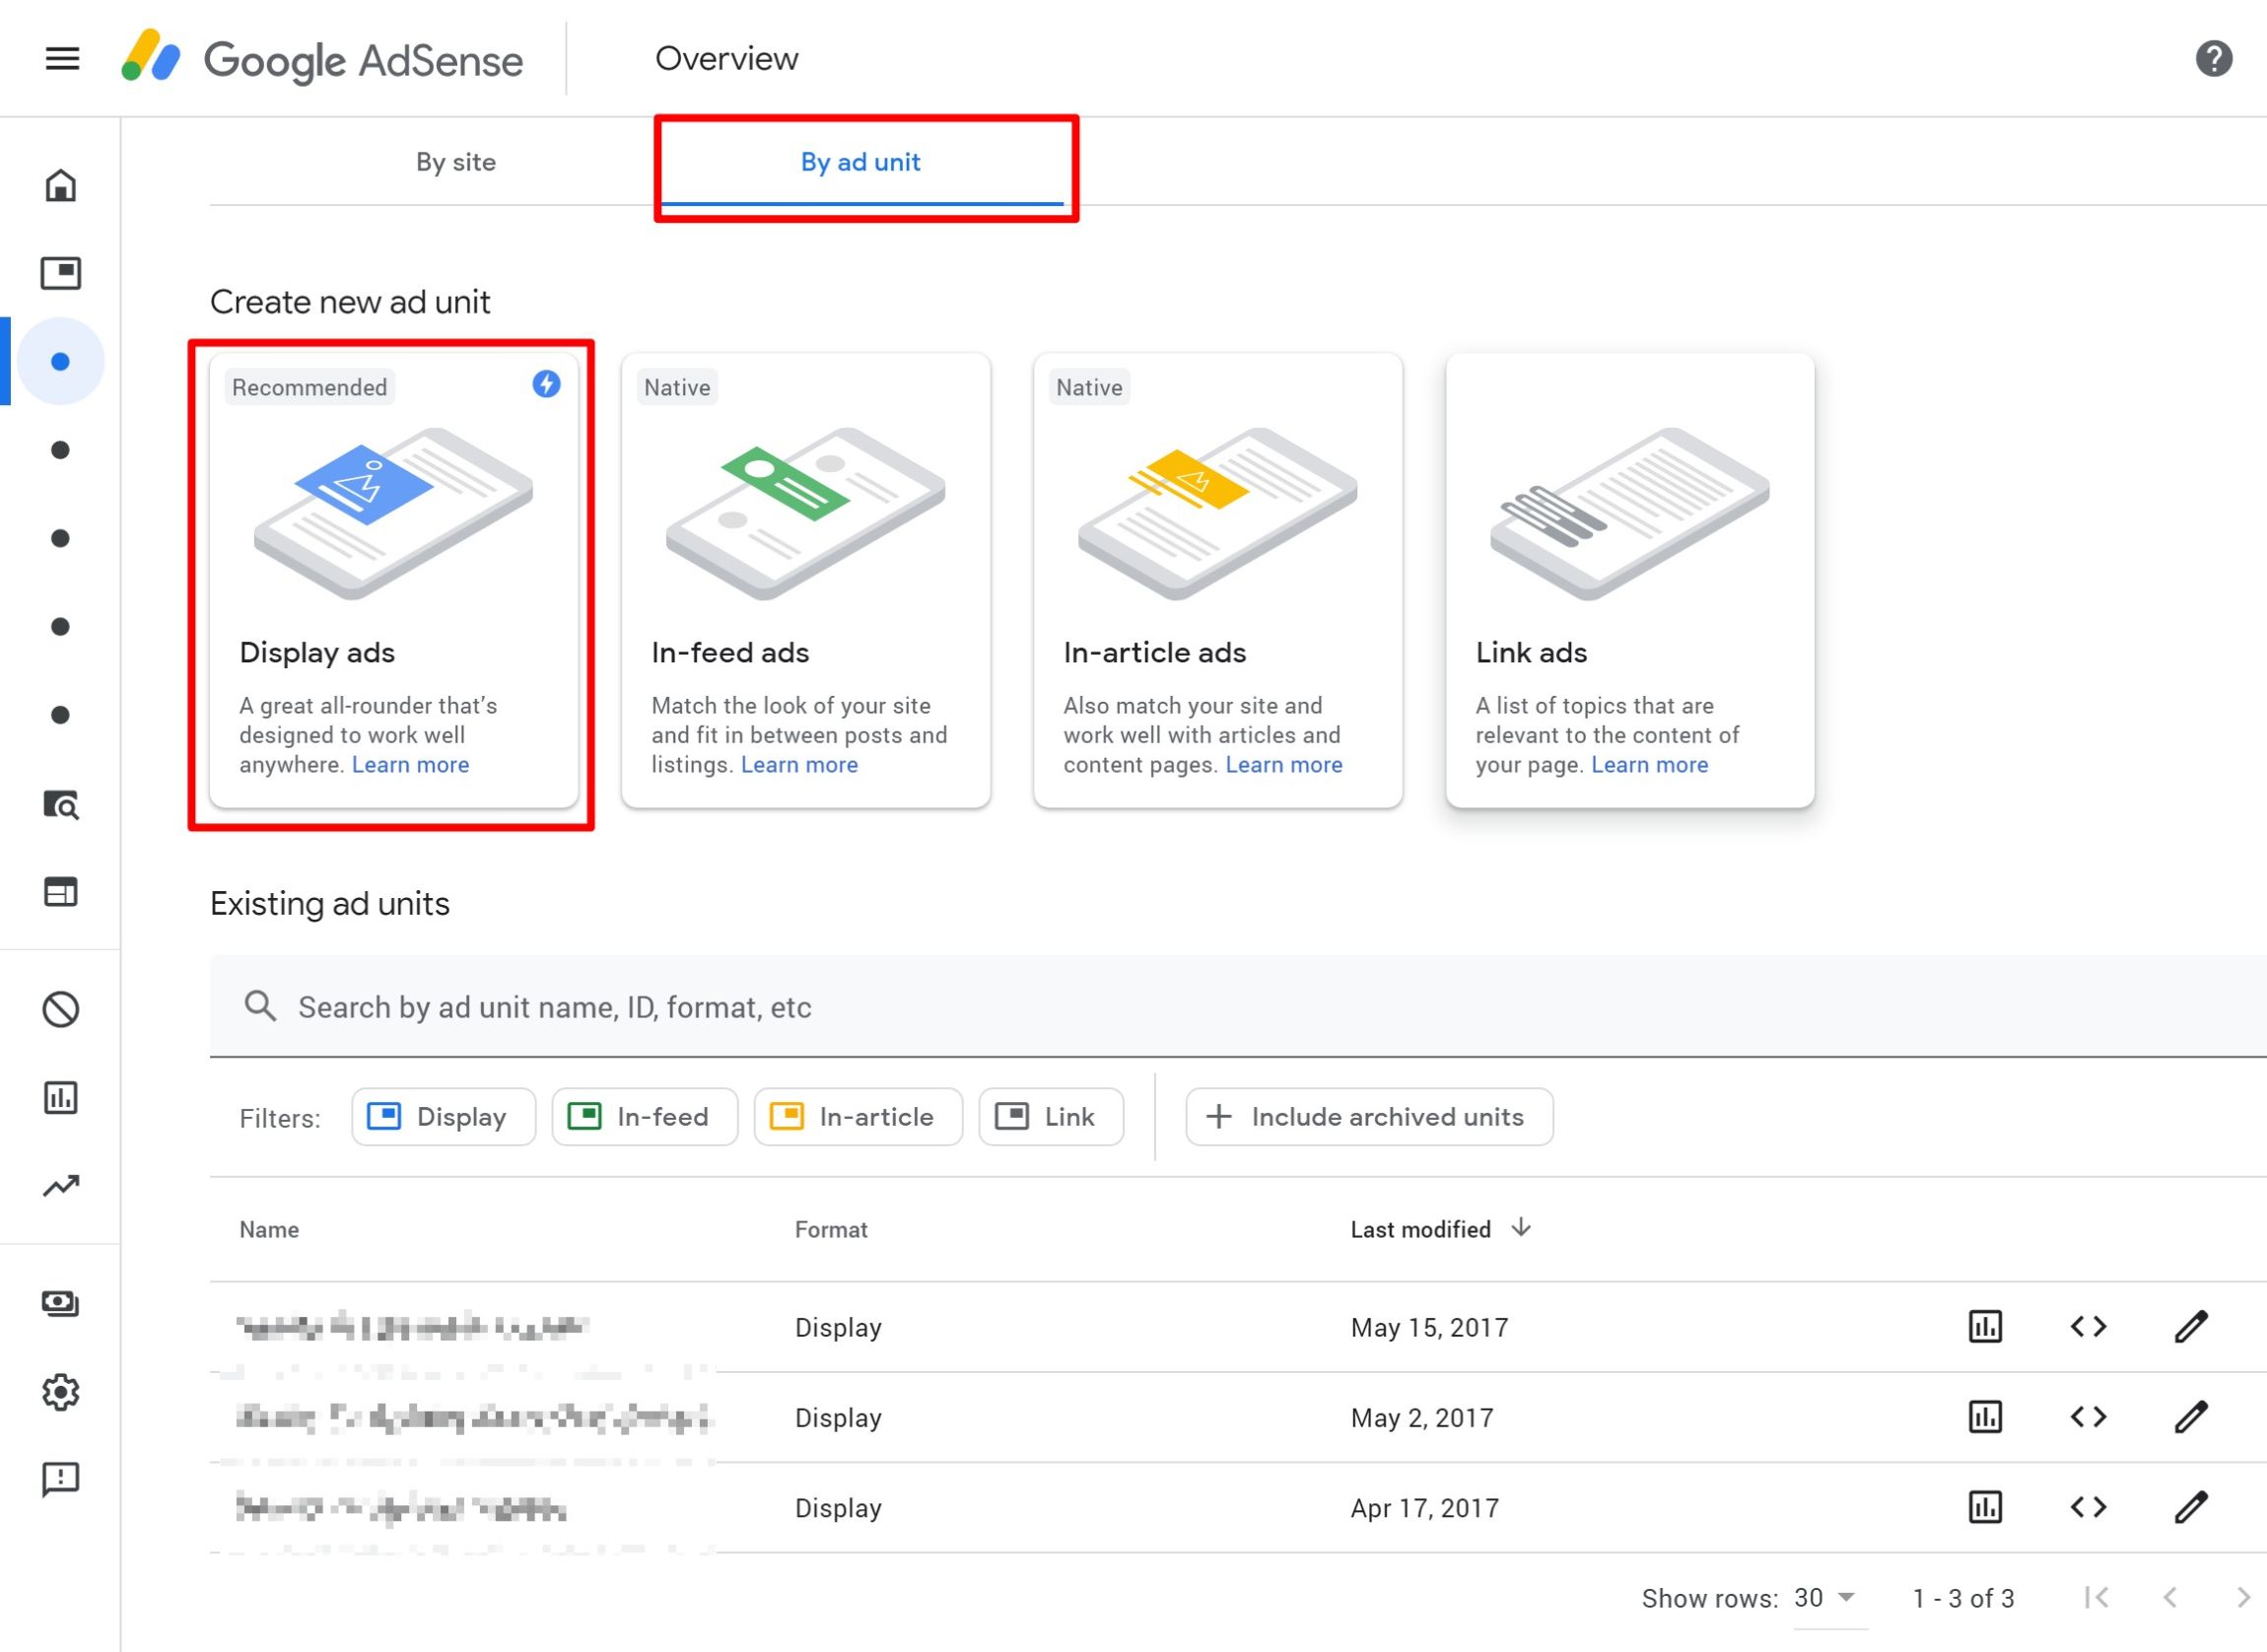
To do so, open your AdSense dashboard and go to Ads → Overview → By ad unit.
Then, choose the format of the ad — typically, you want to use Display ads:
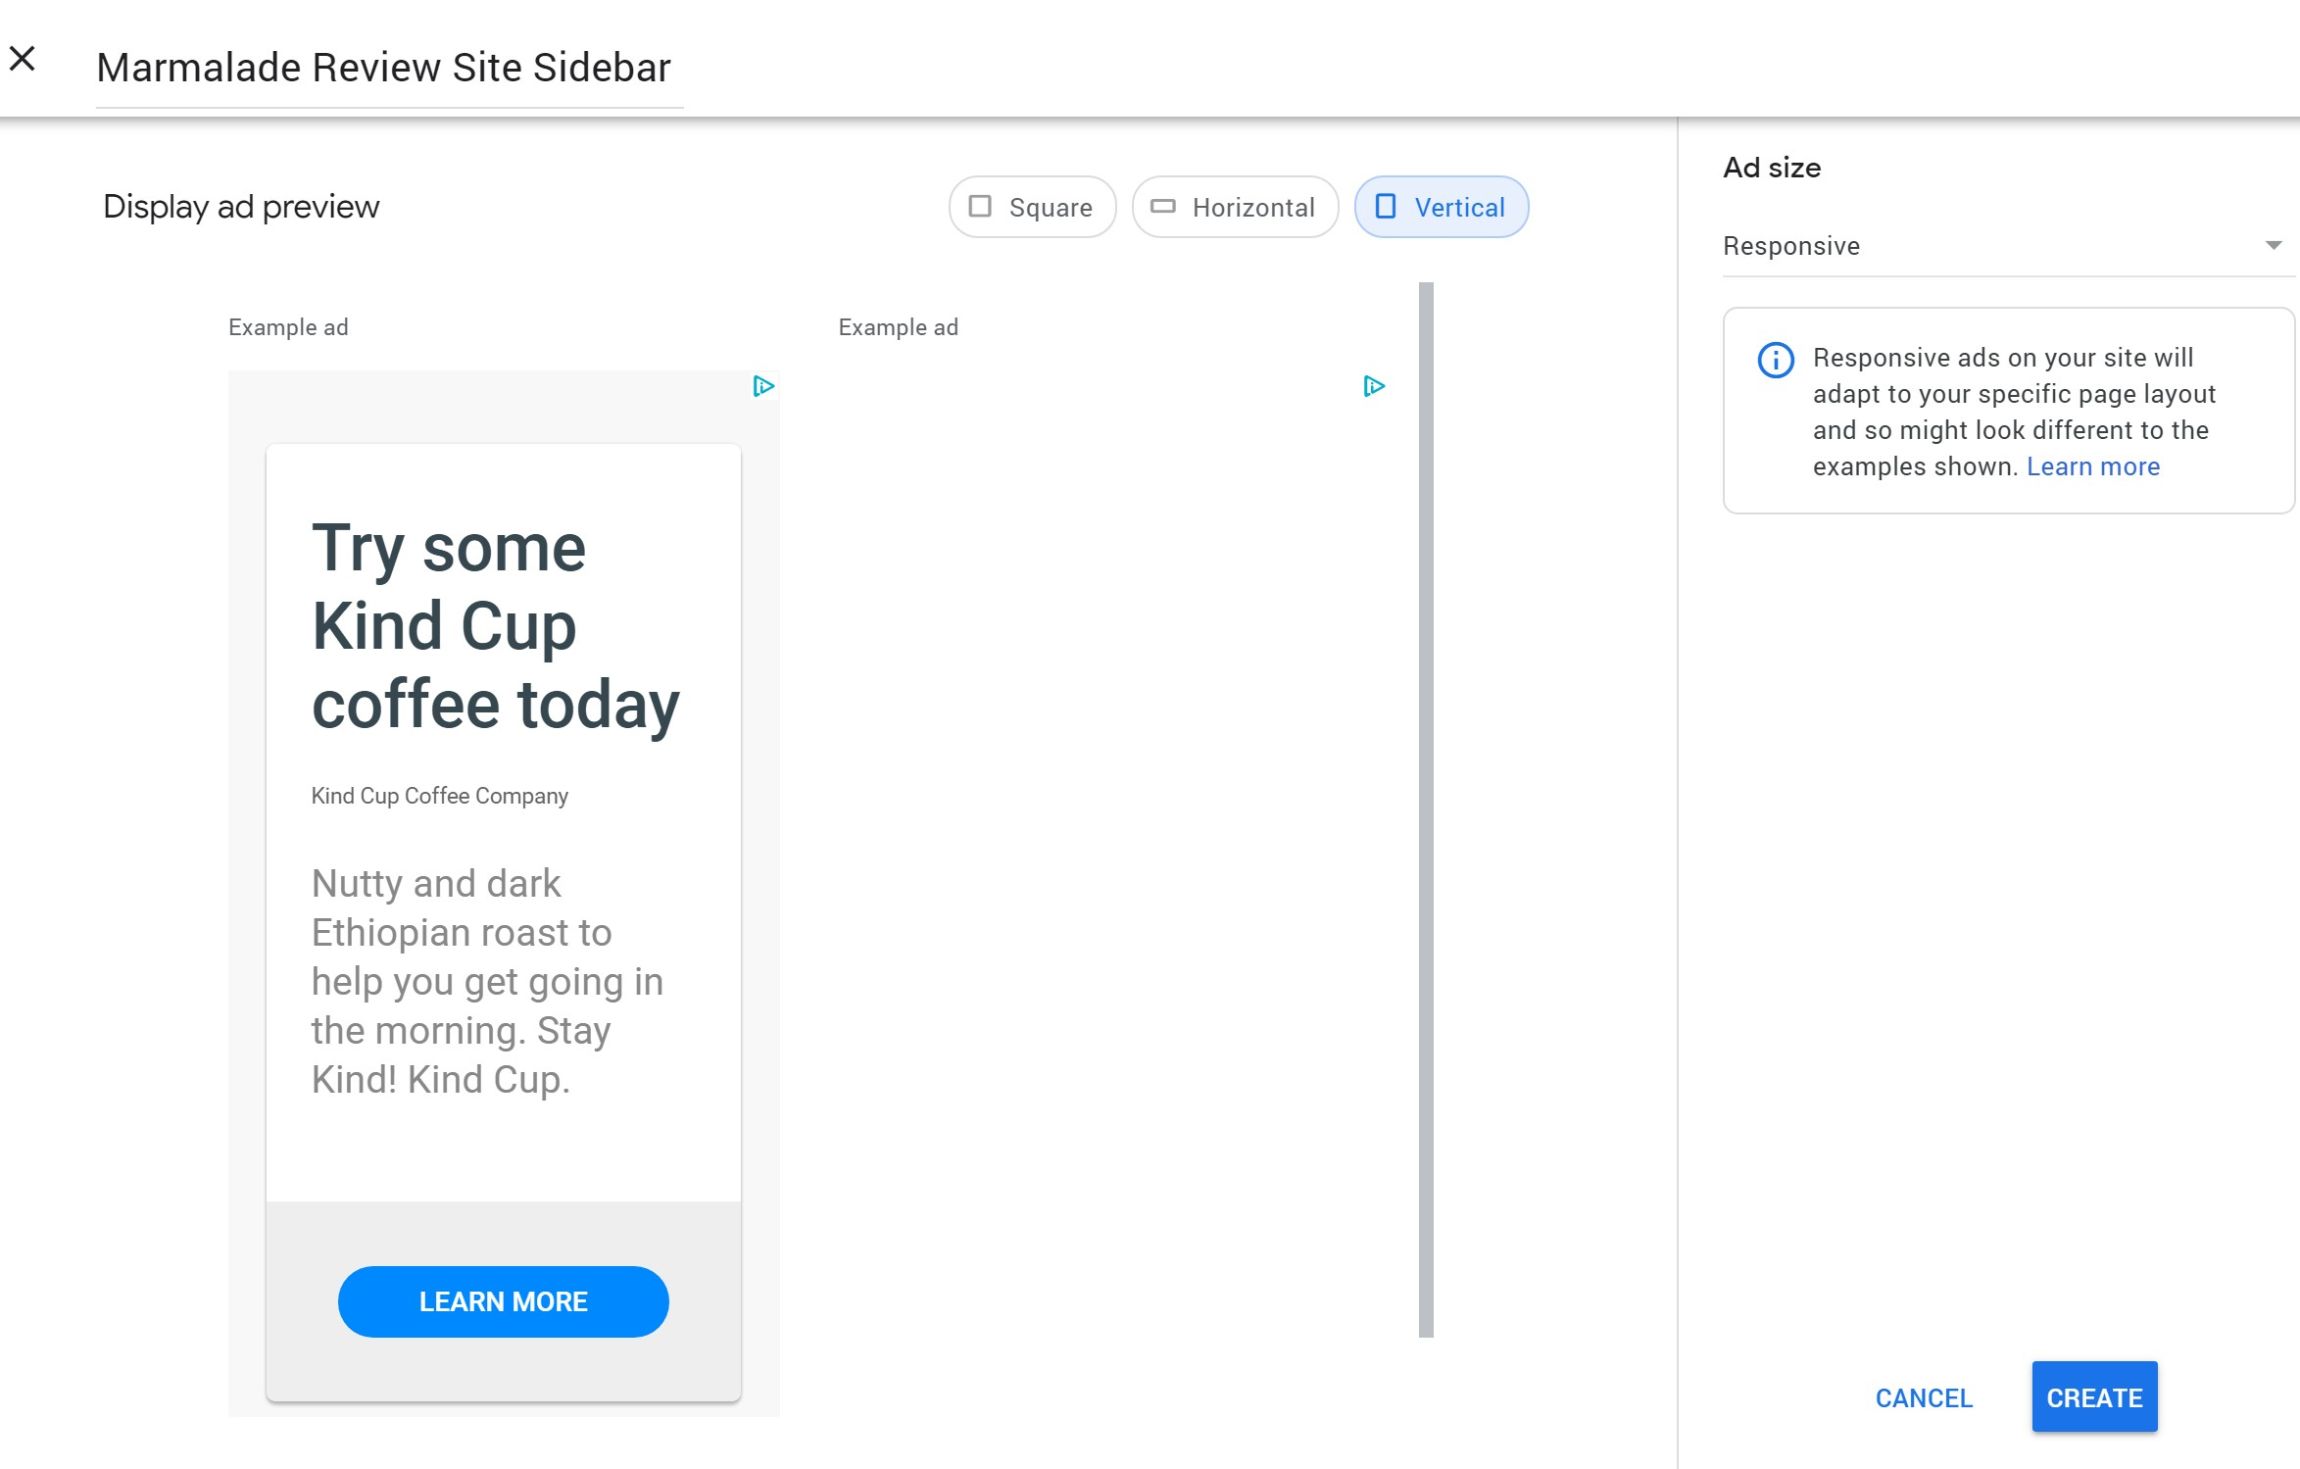
On the next page, give it a name and configure its size and layout. Then, click Create:
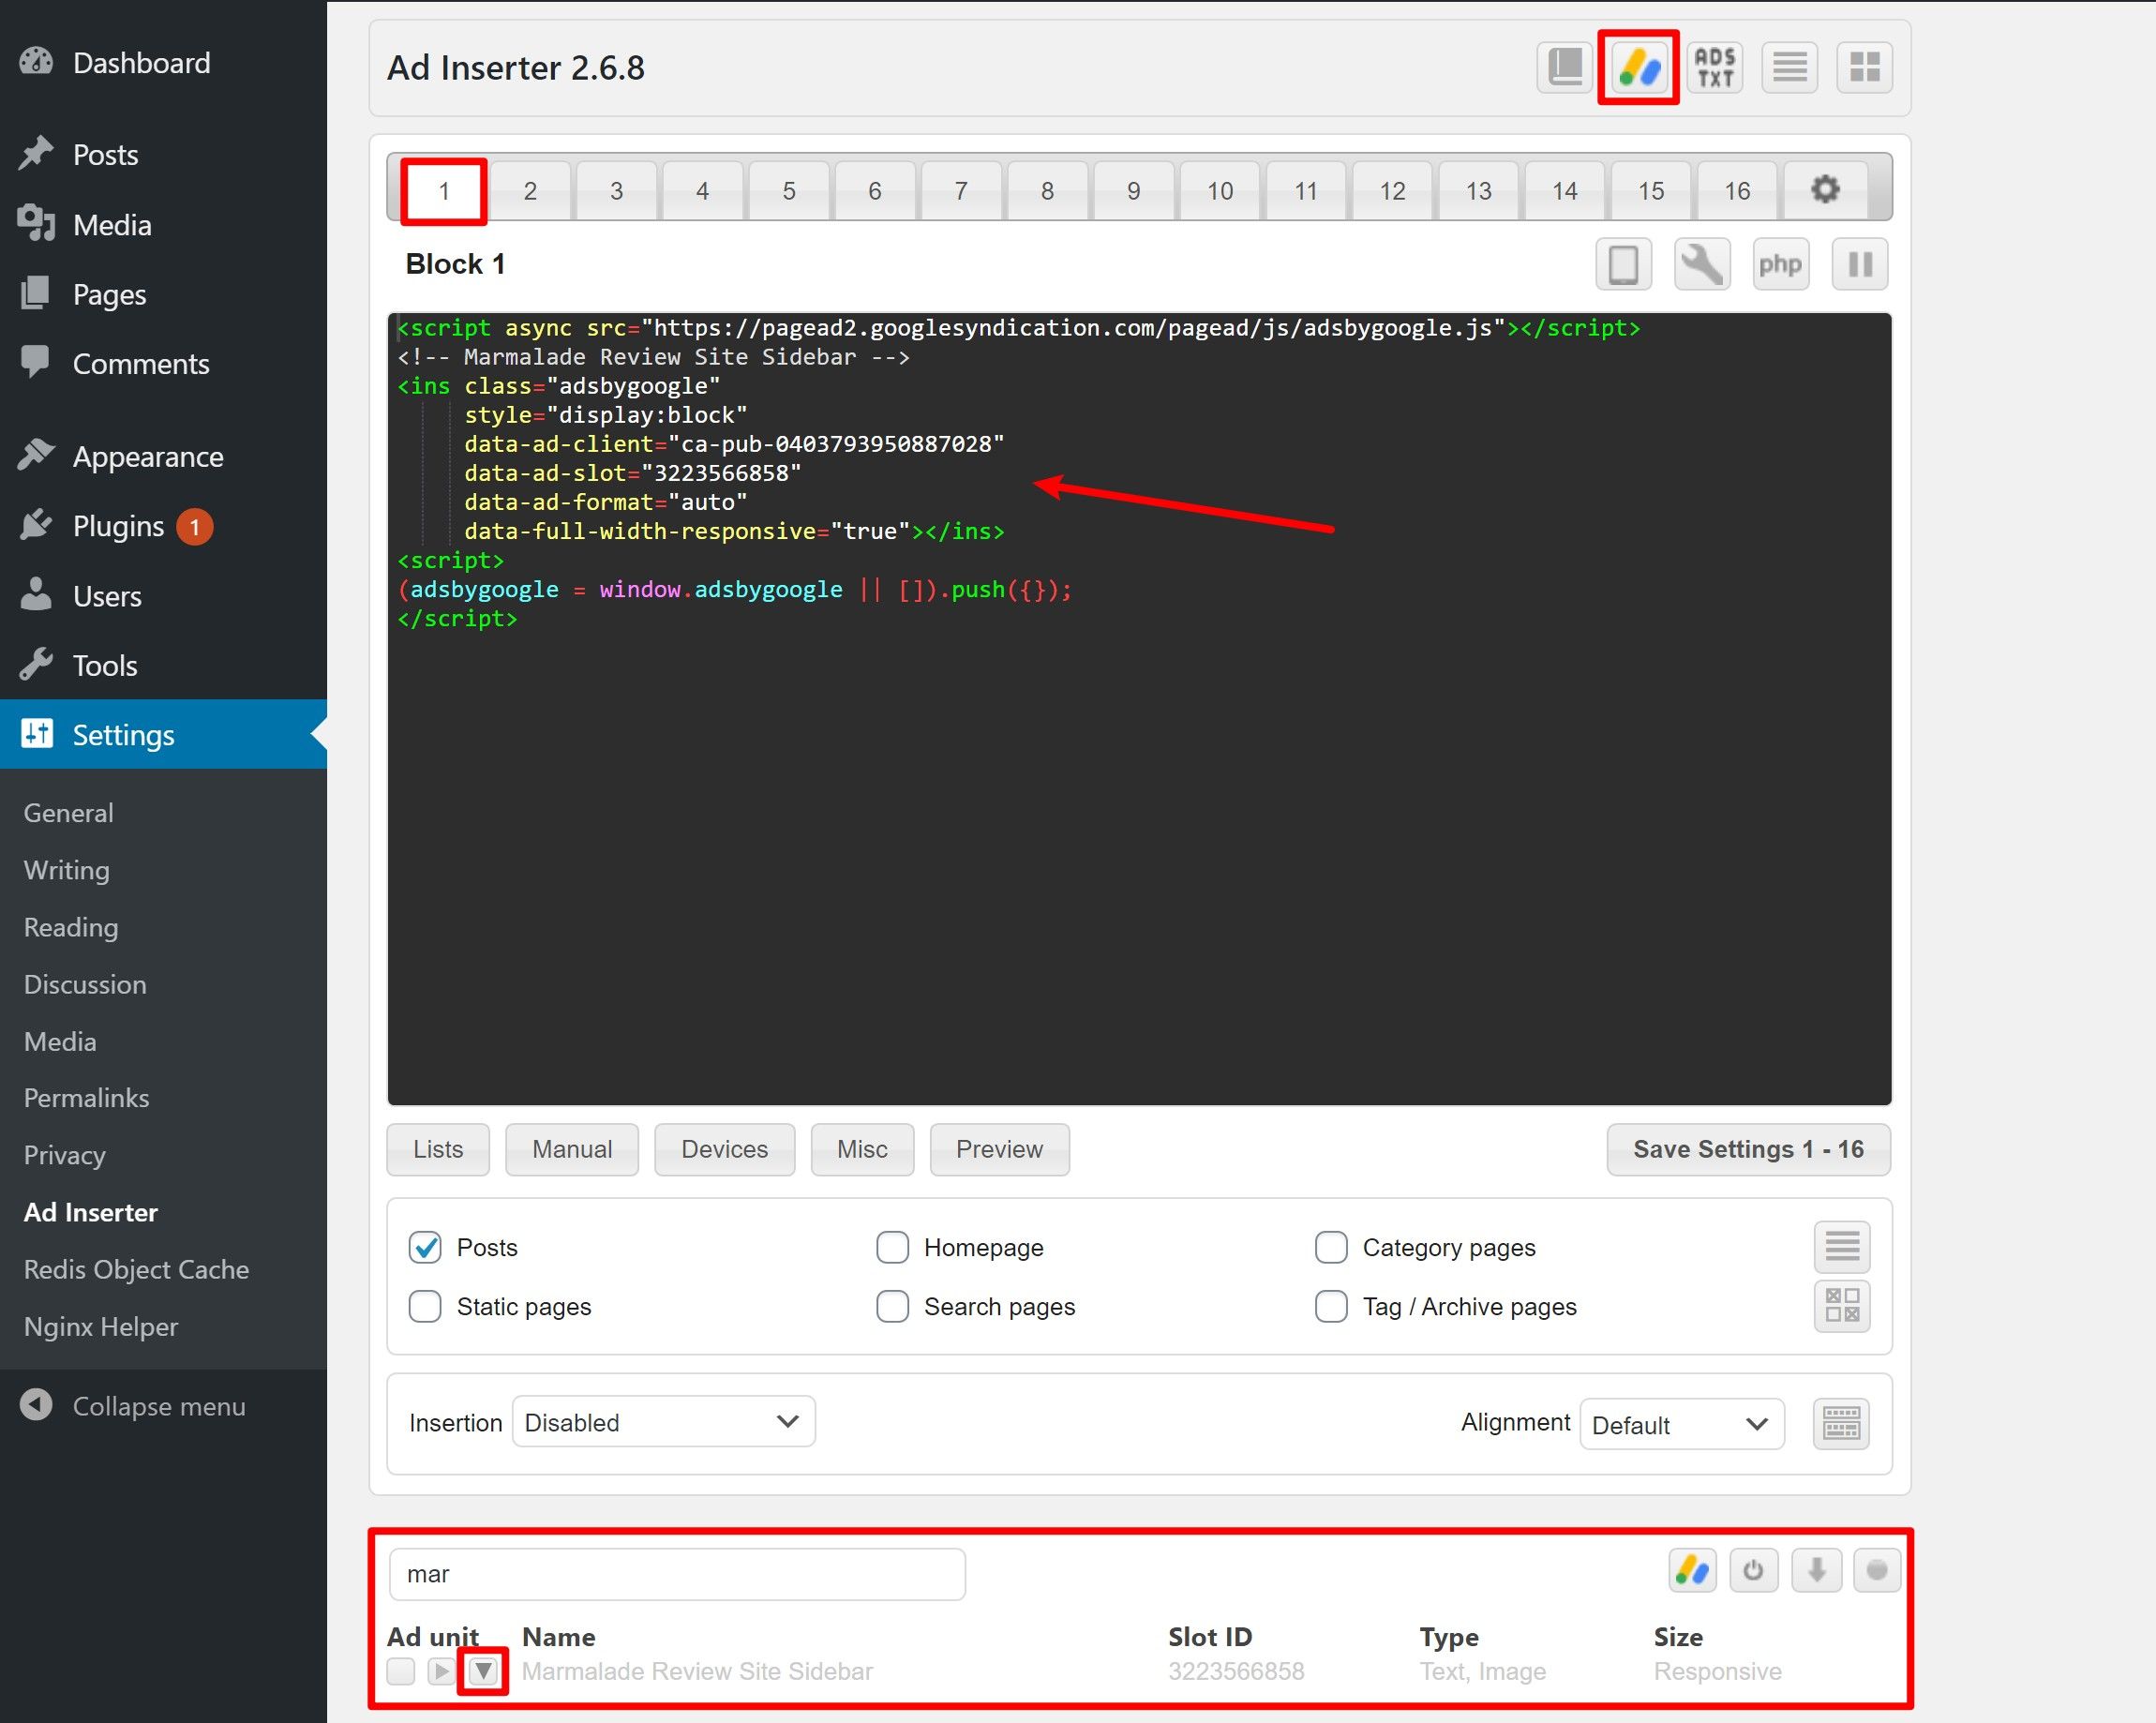
AdSense will then display the ad code — you can either manually add this code to Ad Inserter or you can use Ad Inserter’s built-in integration.
4. Set Up Placement With Ad Inserter
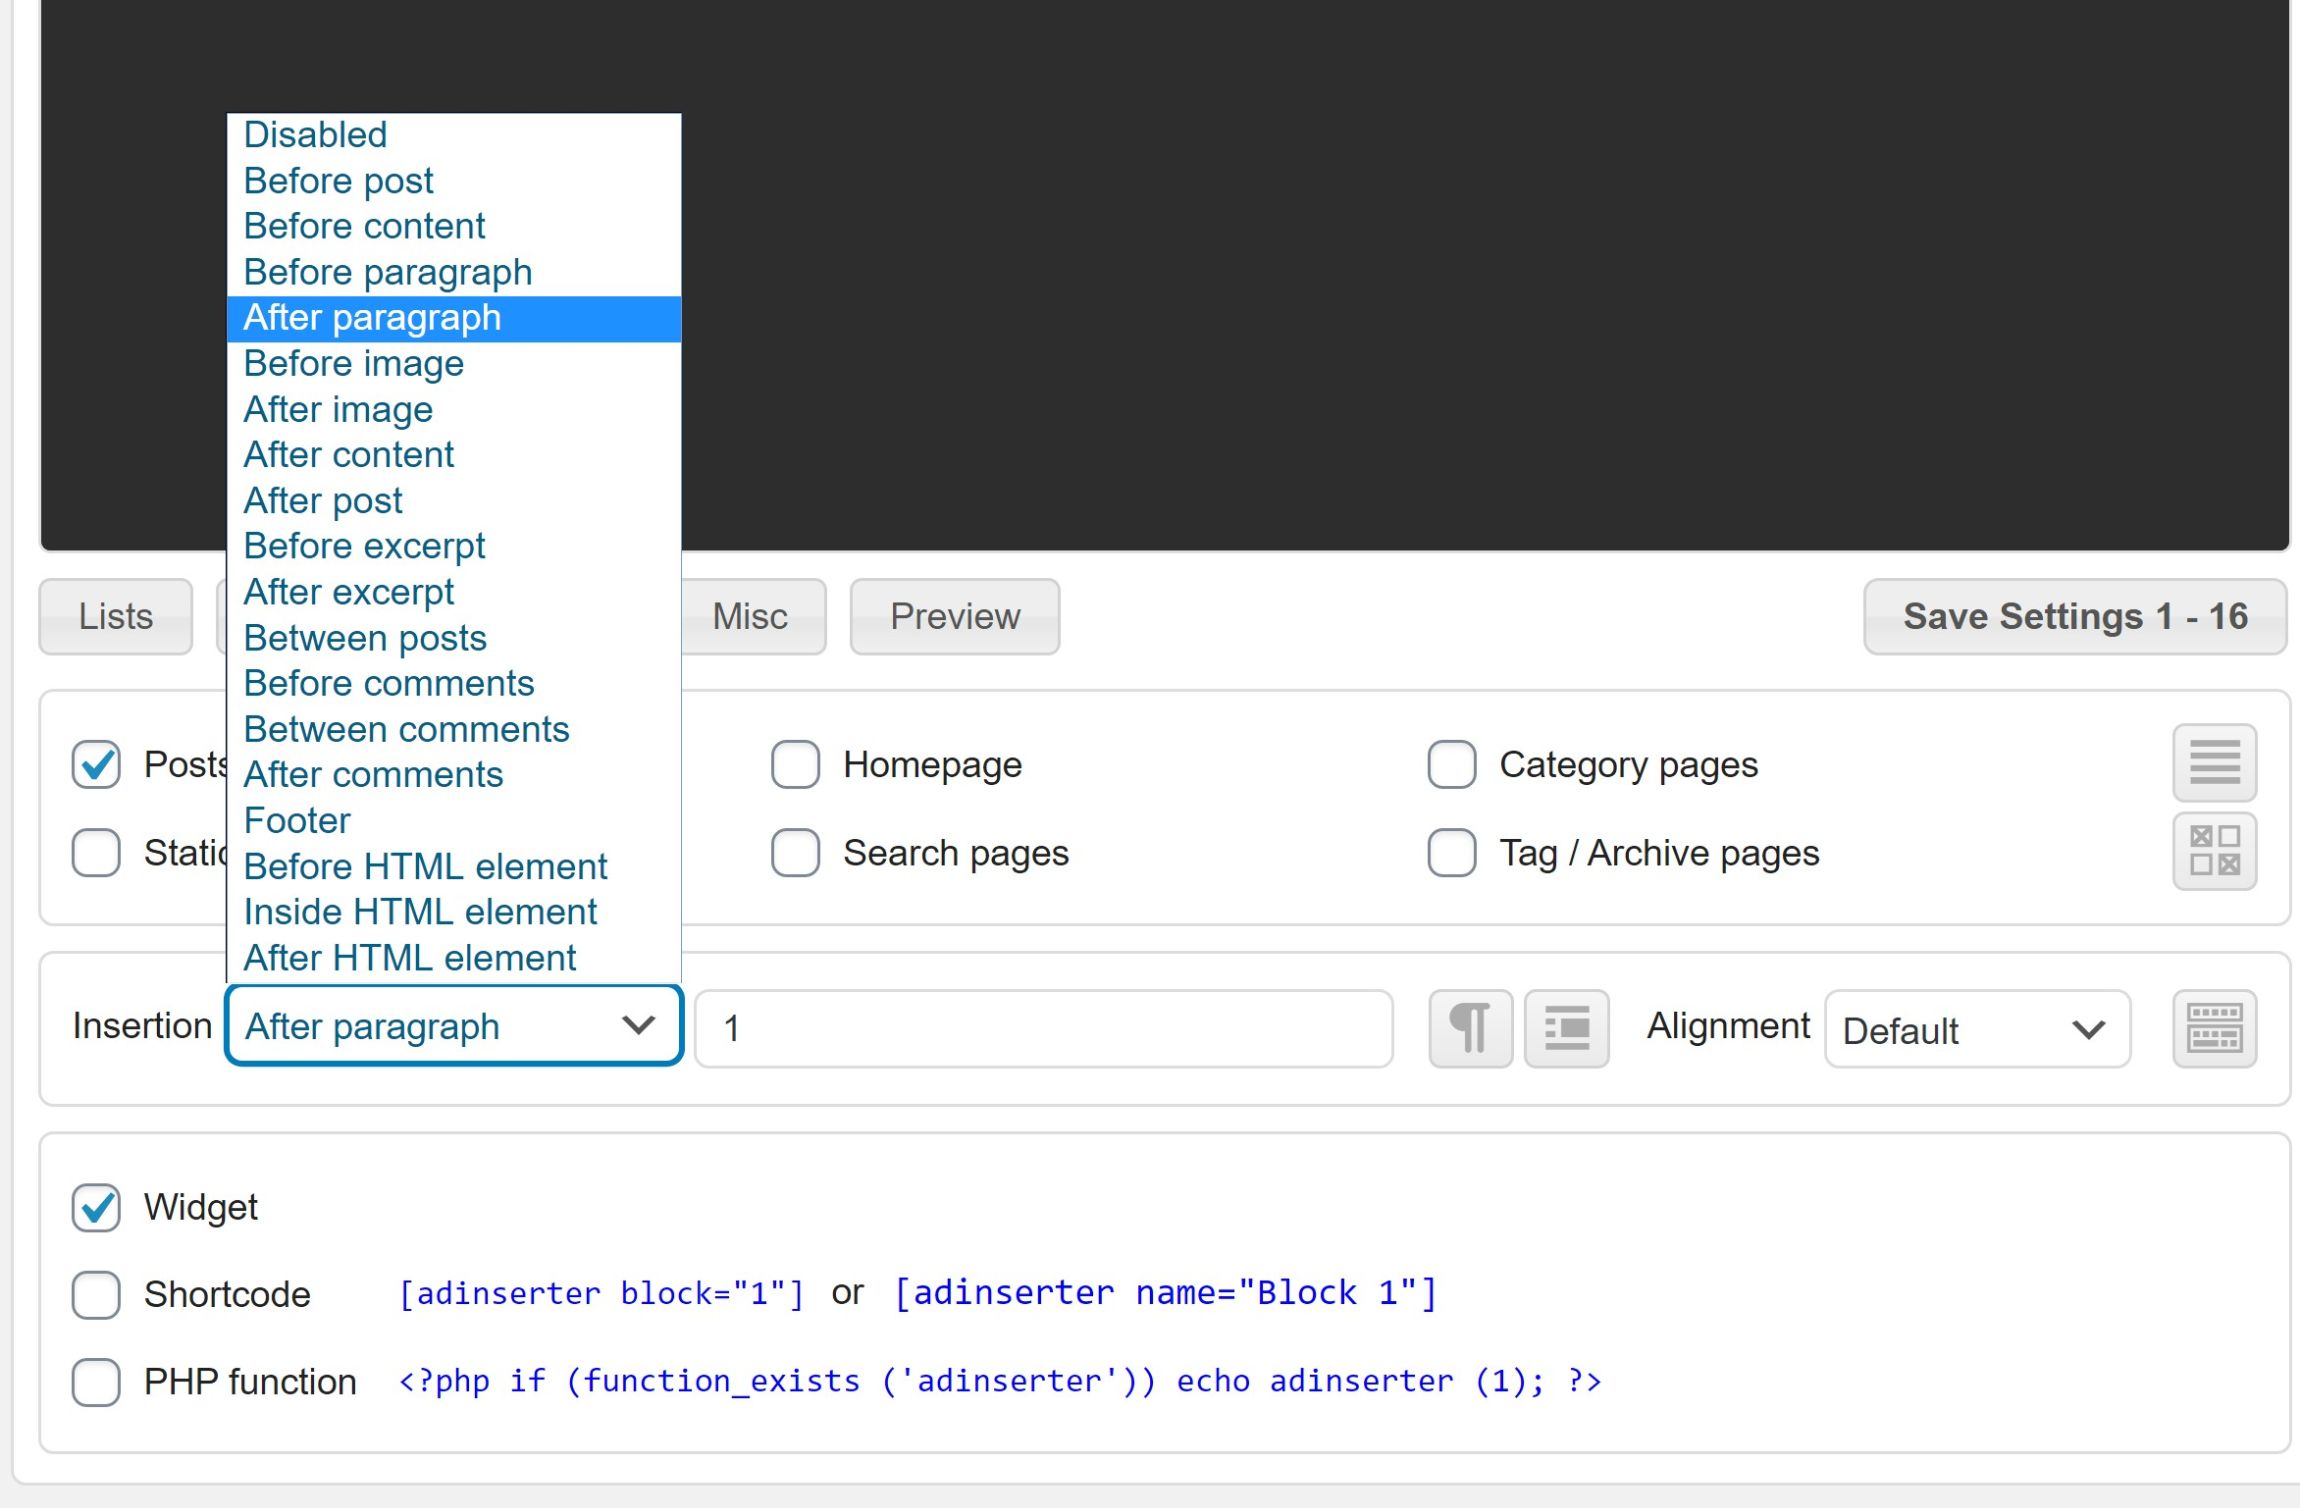
Now, you’re ready to set up your first ad placement. To do so, go to the Ad Inserter settings and select your first block. Then, you can either:
- Manually paste in the ad code from the AdSense dashboard.
- Search for your ad placement using the box at the bottom and click the arrow to automatically add the proper code snippet (make sure you have AdSense turned on — otherwise you won’t see the box.
Now, you can use the Ad Inserter settings to control where and when to display this ad.
First, use the box to control which basic type of content to display the ad on — e.g. all posts. If you want more control, you can click the Lists button to target your ad to specific categories, tags, post IDs, and so on.
You can also use the Devices button to target your ad to specific devices:
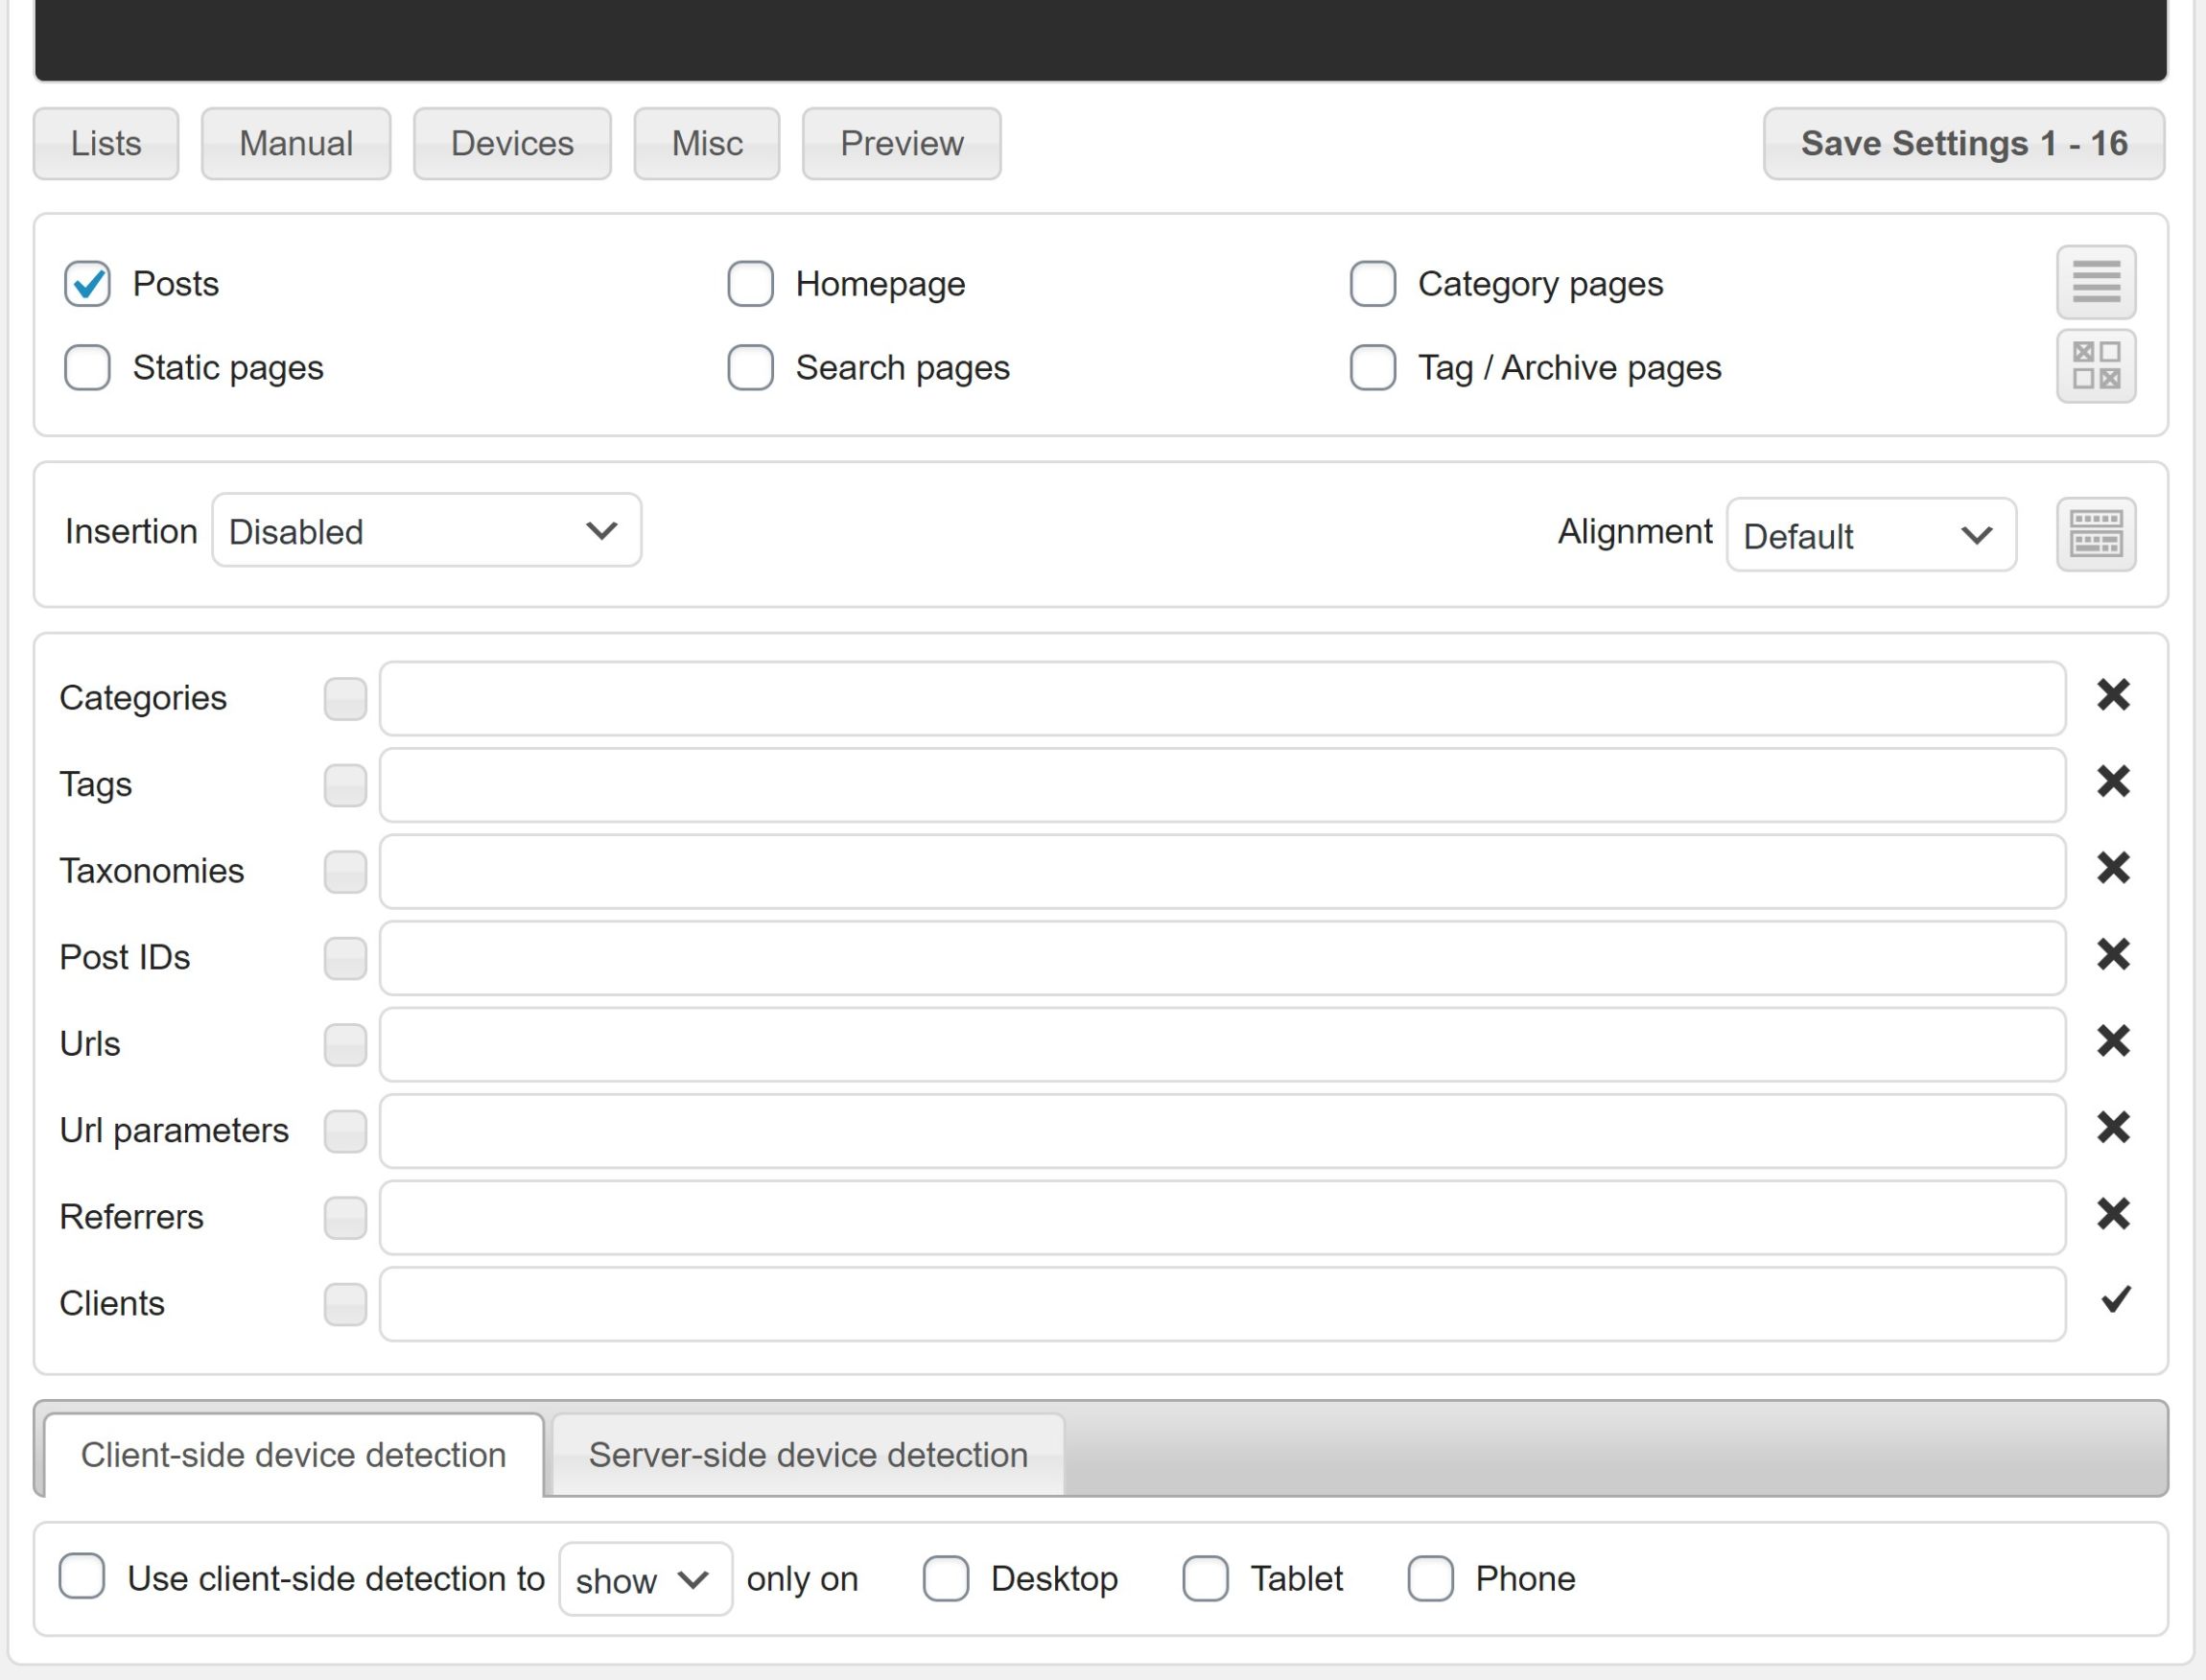
Then, use the Insertion drop-down to select where on the page to inject your ad. You can also click the Manual button to display the manual placement options (e.g. shortcodes or widgets):
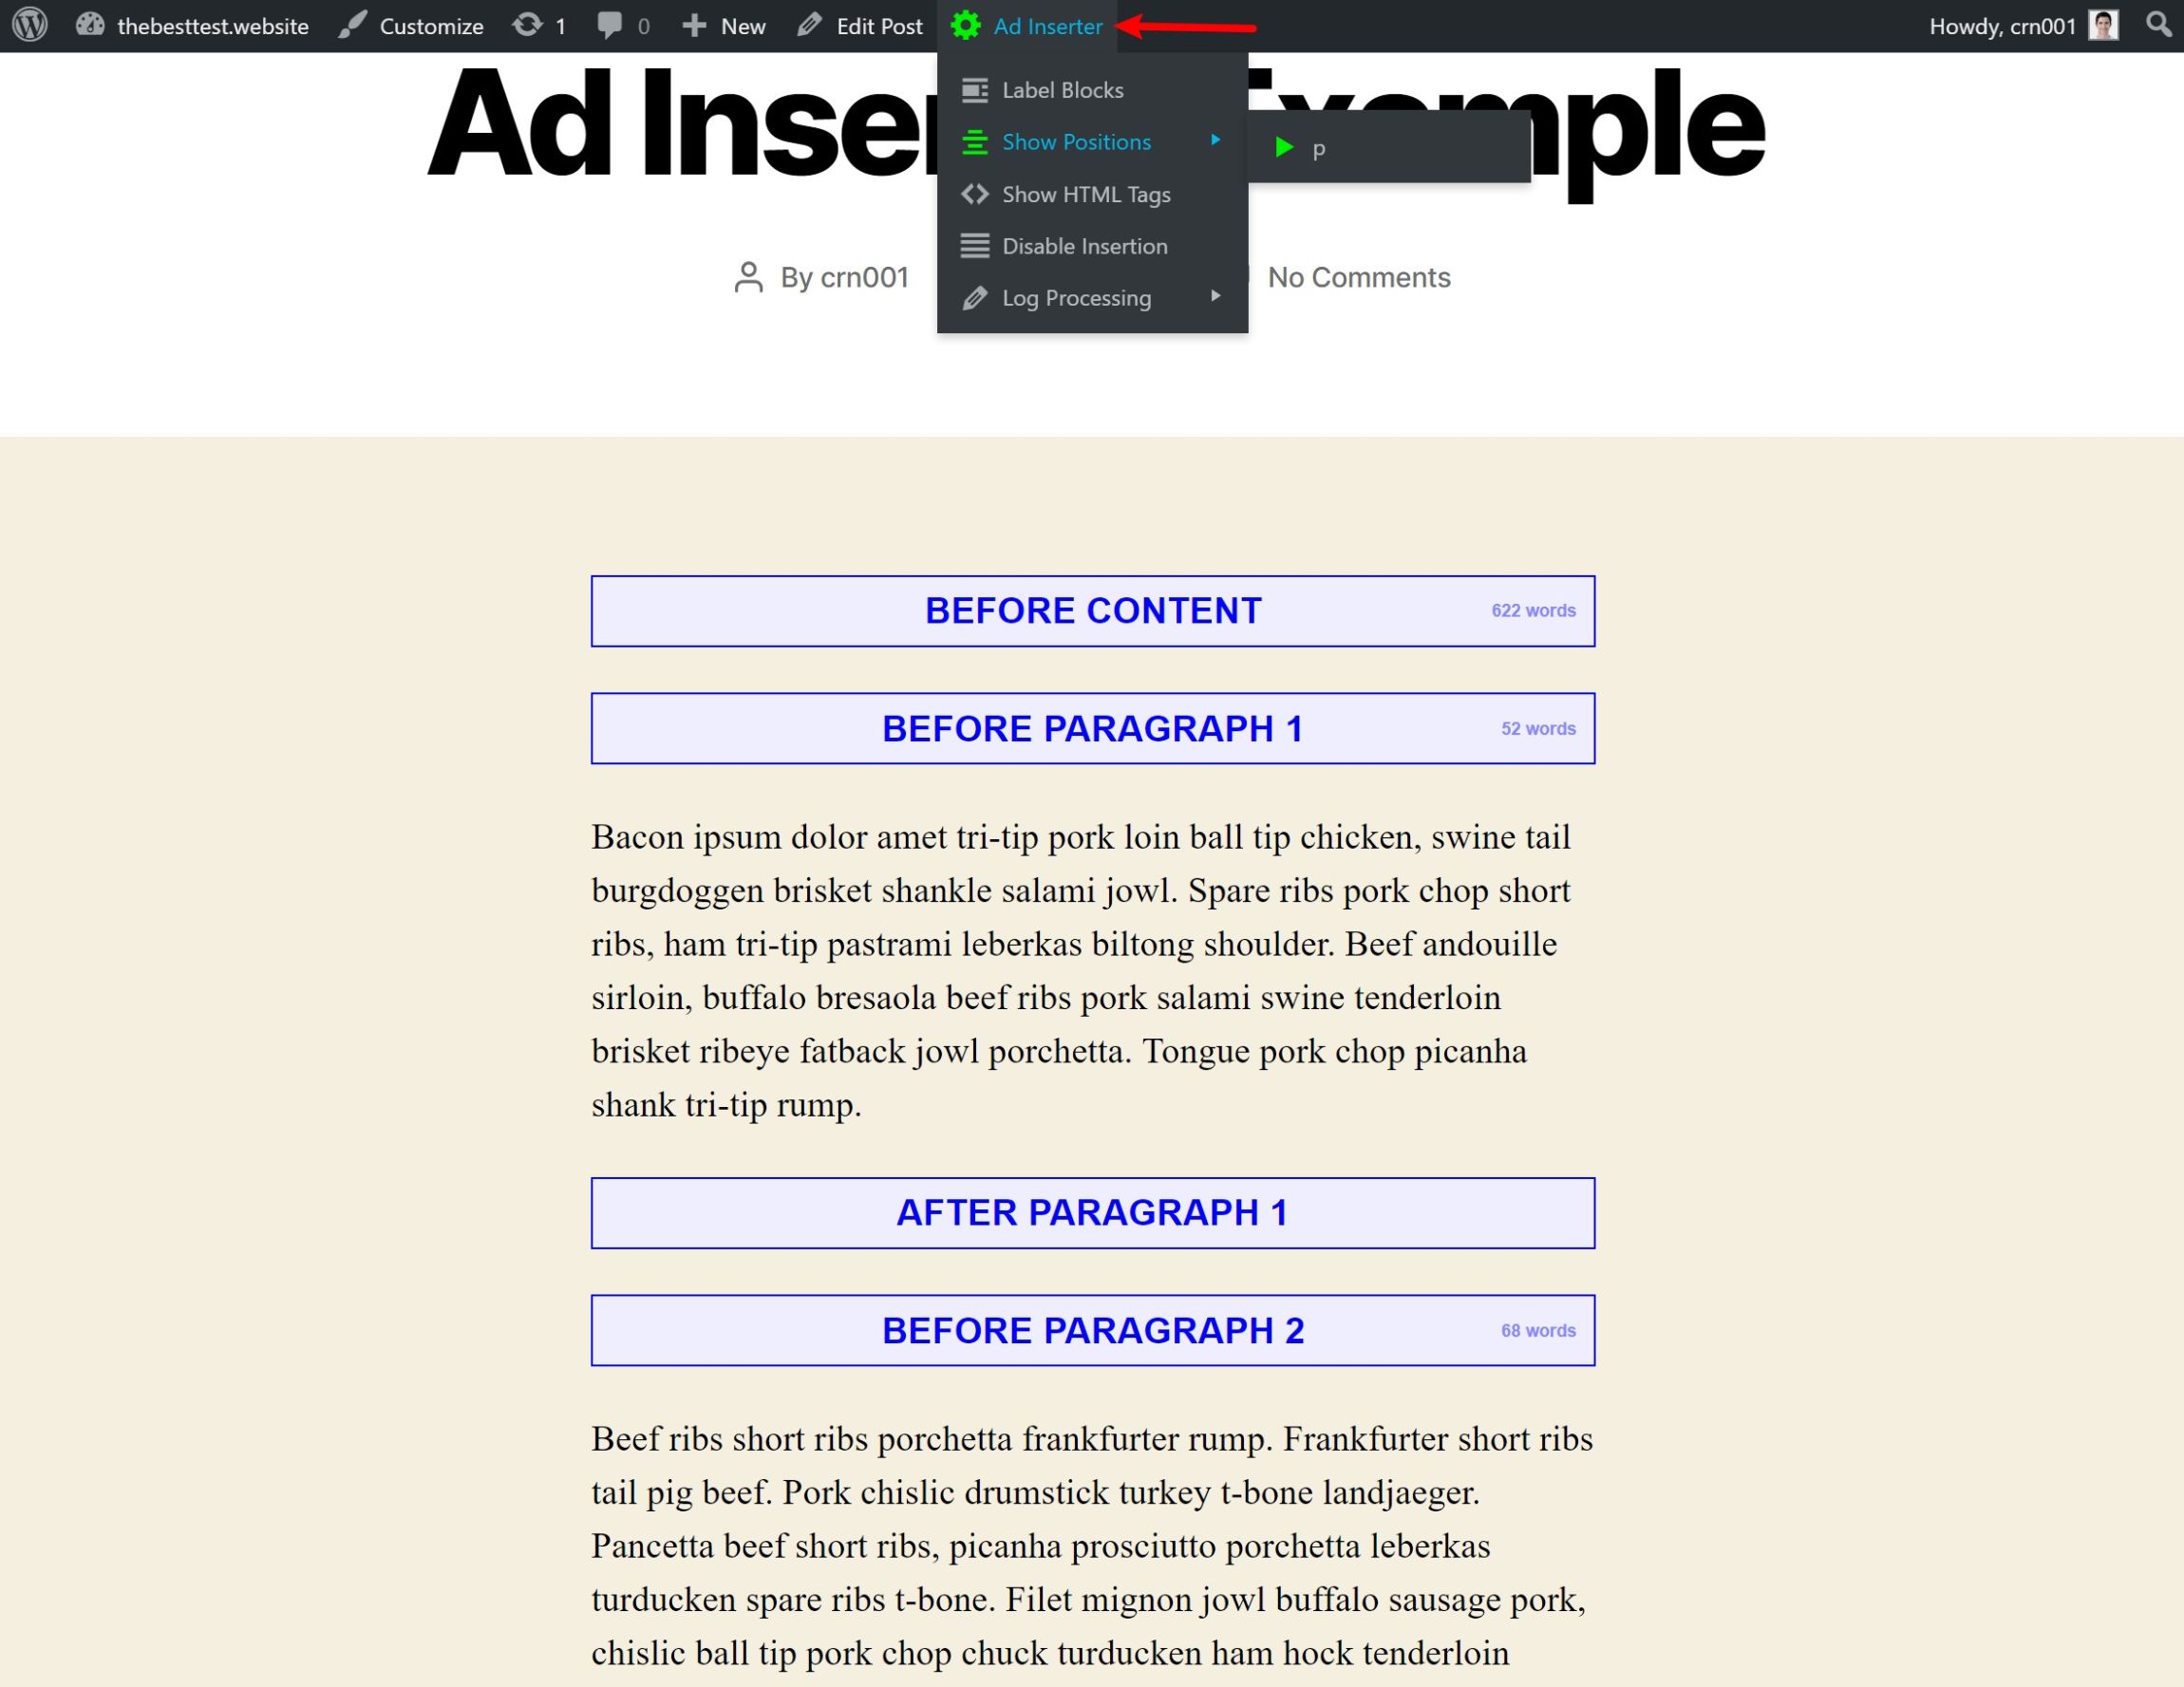
If you want to see where these placement options connect to actual locations on your site, you can open a page on the front end of your site and use the Ad Inserter option on the WordPress toolbar to select Show Positions:
And that’s it! Once you save your settings, your ad should be live at the location you specified.
How to Use AdSense Auto Ads With Ad Inserter
To recap, AdSense Auto Ads is an official AdSense feature that lets Google control ad placement on your site. That is, instead of manually placing ads with Ad Inserter, you can just let Google display them wherever it thinks is optimal.
To run Auto Ads, all you need to do is add the regular AdSense verification snippet to every page on your site, which you already did in Step #1. This is the code snippet Google gives you after you add your website via the AdSense dashboard.
Once you’ve added the code snippet to your site, here’s how to enable AdSense Auto Ads:
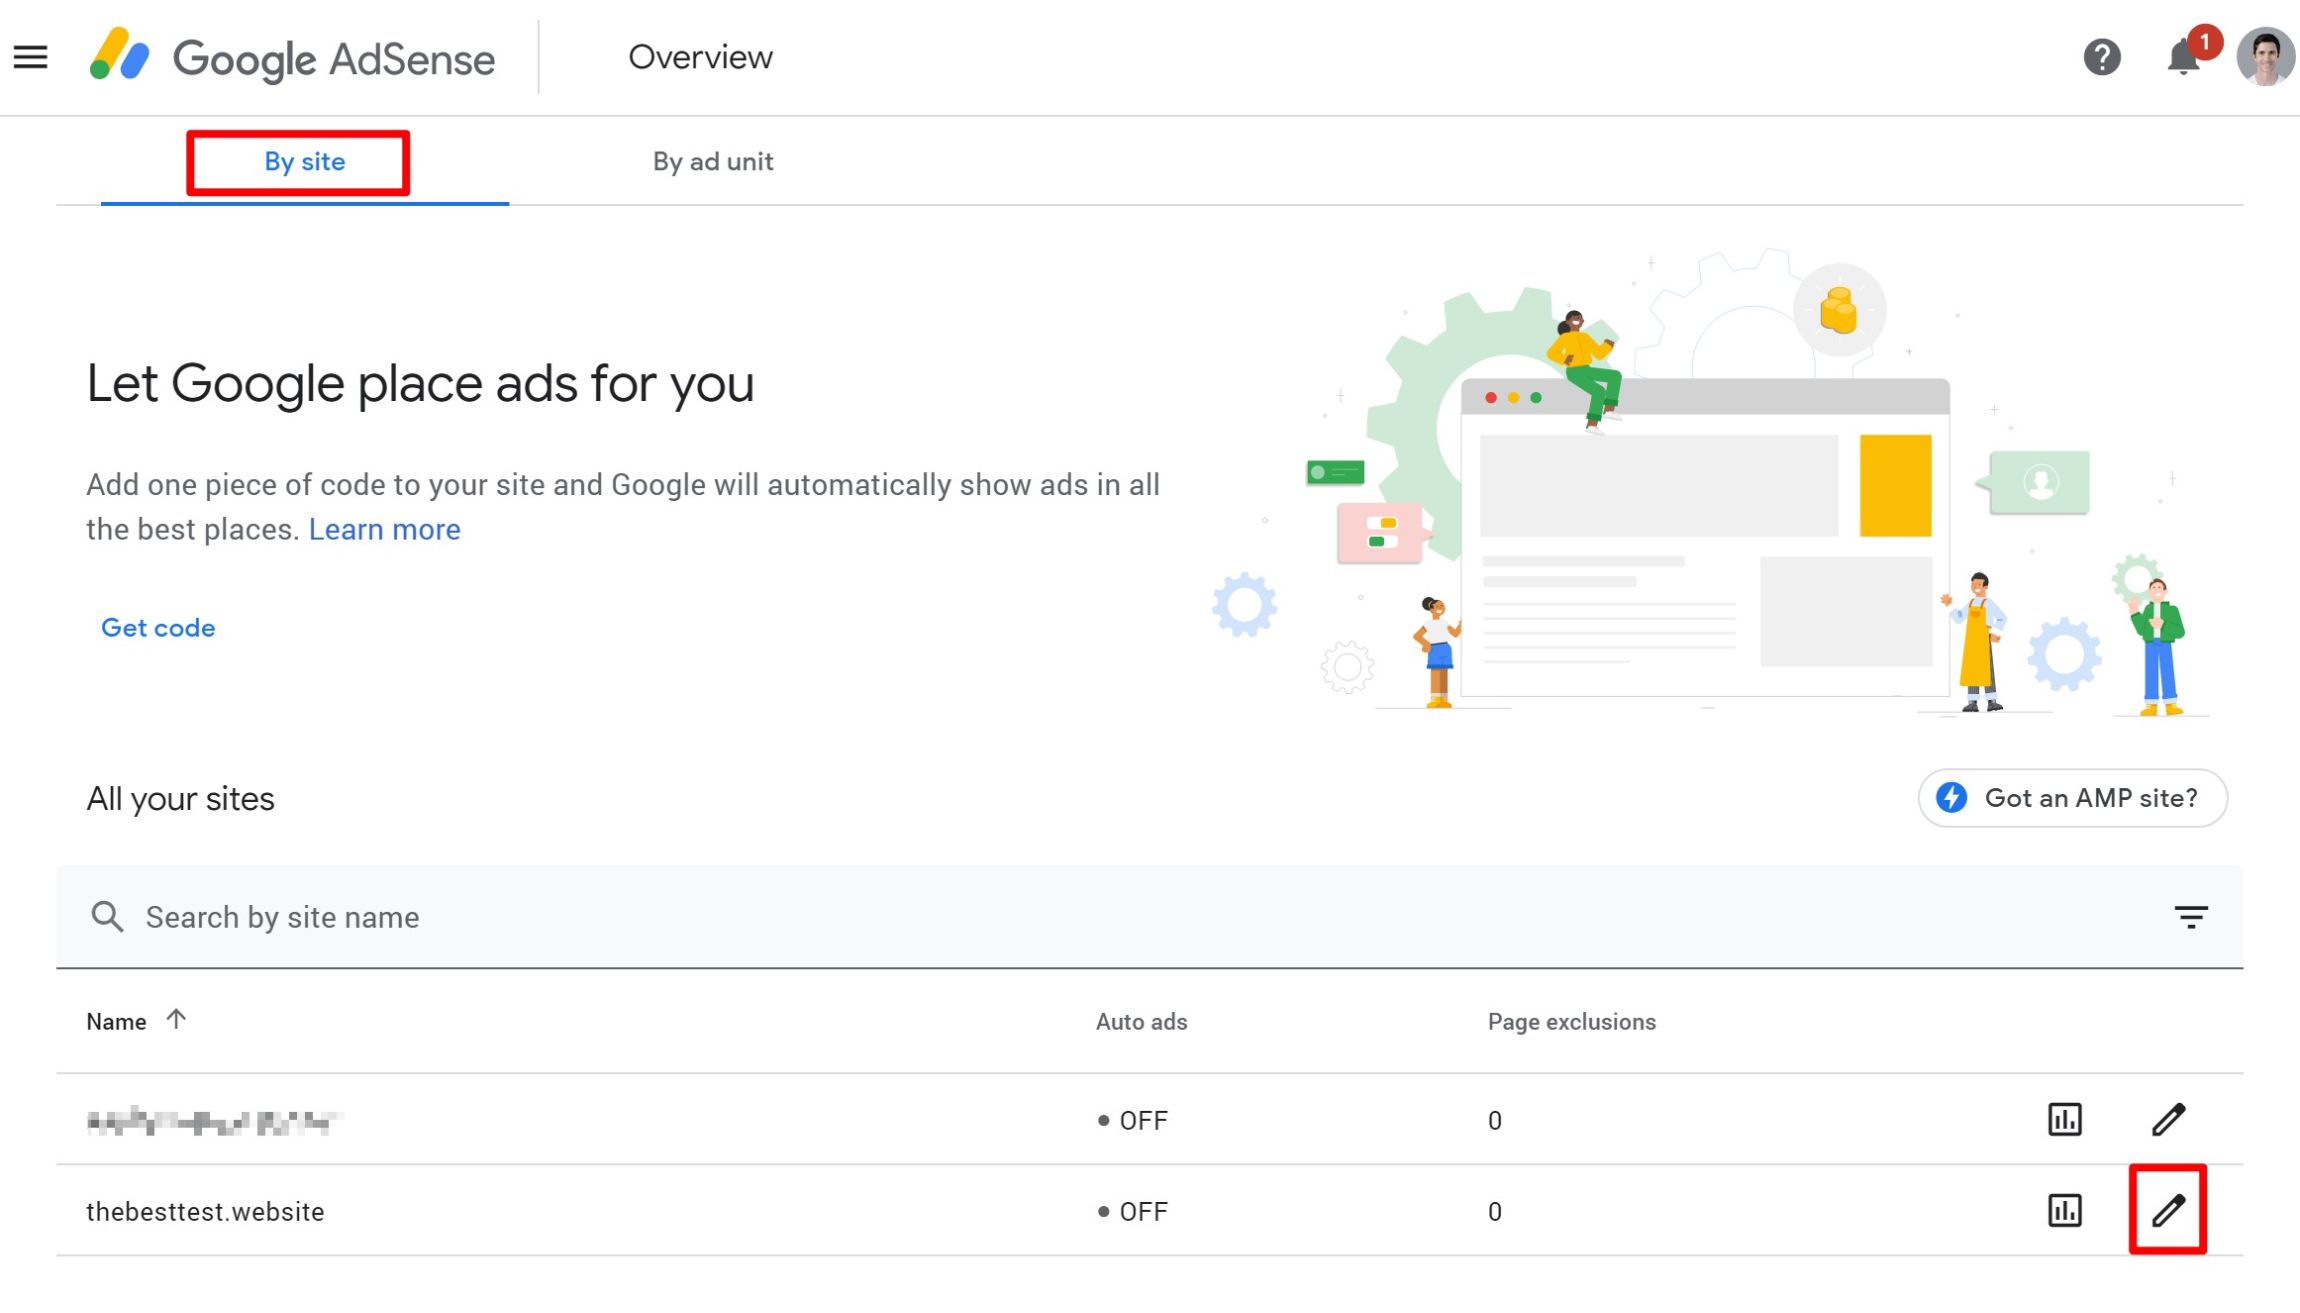
- Go to the Ads tab in the AdSense dashboard.
- Select the By site option.
- Click the pencil icon to edit the site where you want to enable Auto Ads.
Then, click the toggle to enable Auto ads and click Apply to site:
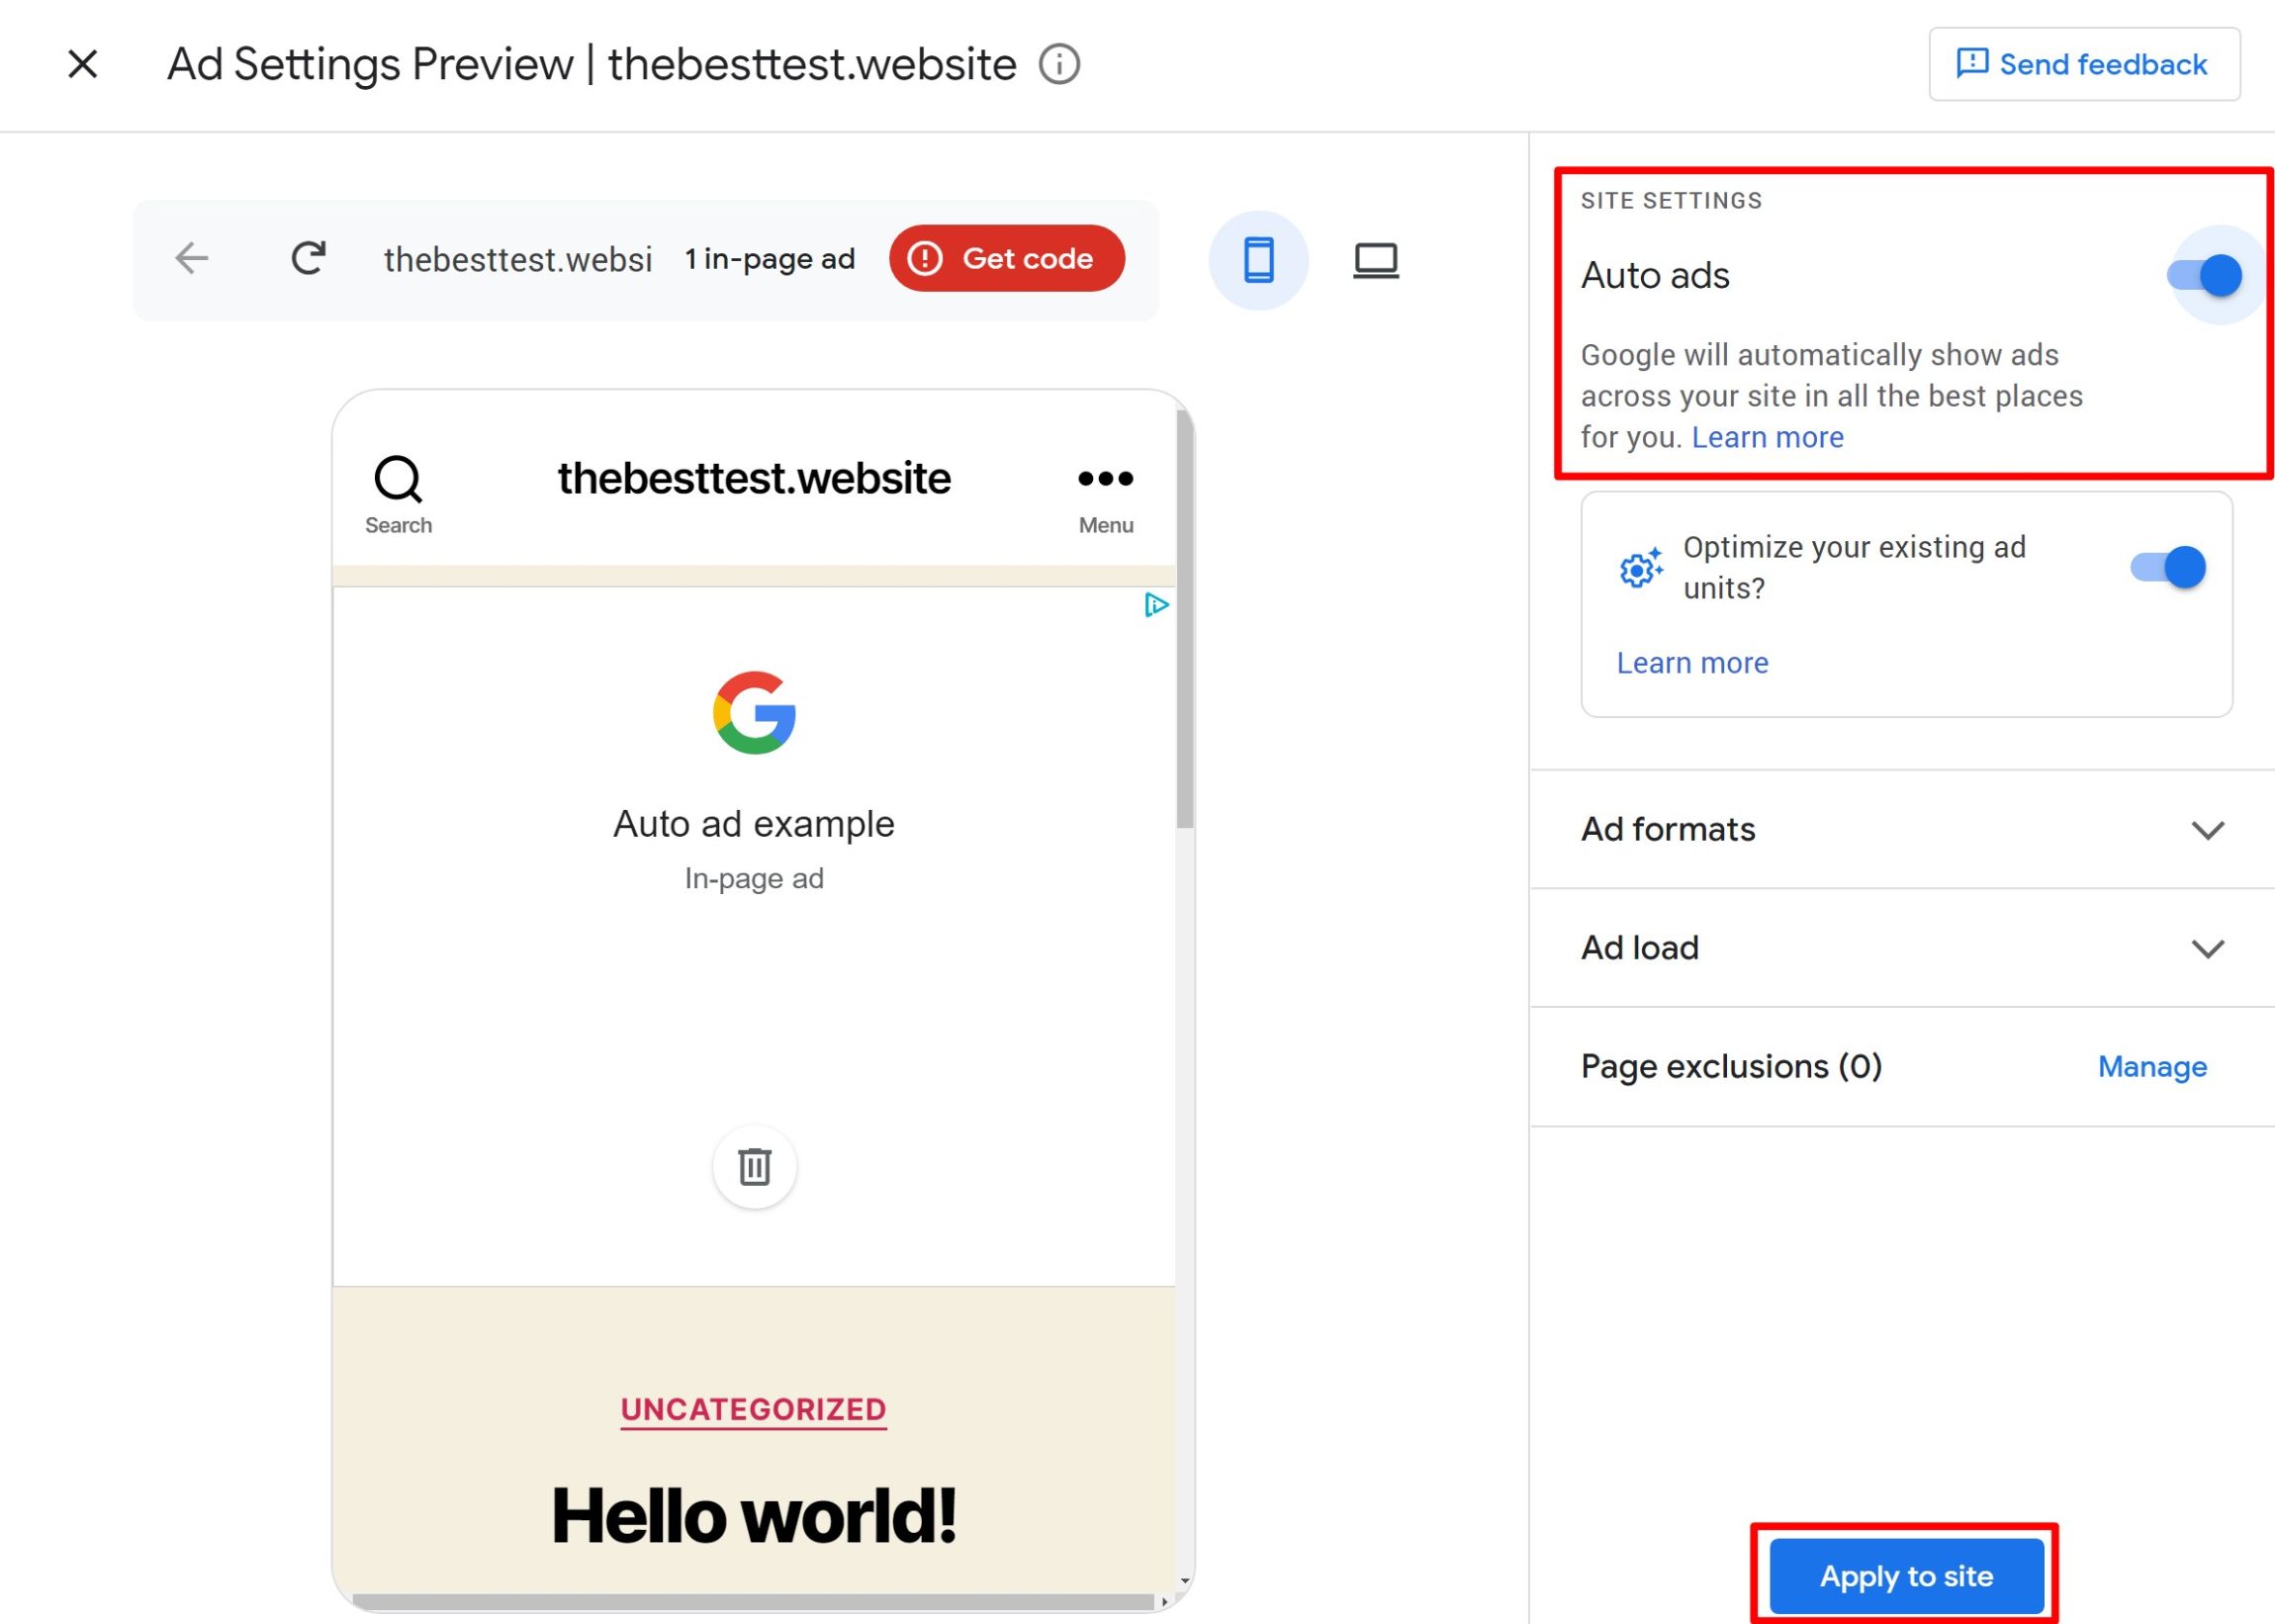
And that’s it! AdSense will automatically handle placement on your site. If you don’t like a placement, you can disable it from this same interface by clicking the trash can icon on the ad’s placement on the live preview of your website.
Start Using AdSense With WordPress Today
With AdSense, you can monetize your WordPress site on autopilot.
You should still experiment with other revenue sources and ad providers, but it’s tough to beat the convenience of AdSense.
With the plugins on this list, you’ll be able to easily and automatically place AdSense ads anywhere on your WordPress site. Pick your favorite and start monetizing your website today.
Used/using AdSense on WordPress? Thoughts?
Discover more from WPMarmalade
Subscribe to get the latest posts sent to your email.