Need to add a table to a WordPress post or page using the WordPress editor? Luckily, the process is really straightforward, and uses just the WordPress editor — no plugins necessary!
In this article, I’ll take you through the steps needed to add a table to a WordPress post or page — with minimum fuss!
Let’s get started:
How to Create a Table in WordPress
You can add a table in WordPress by following the steps below.
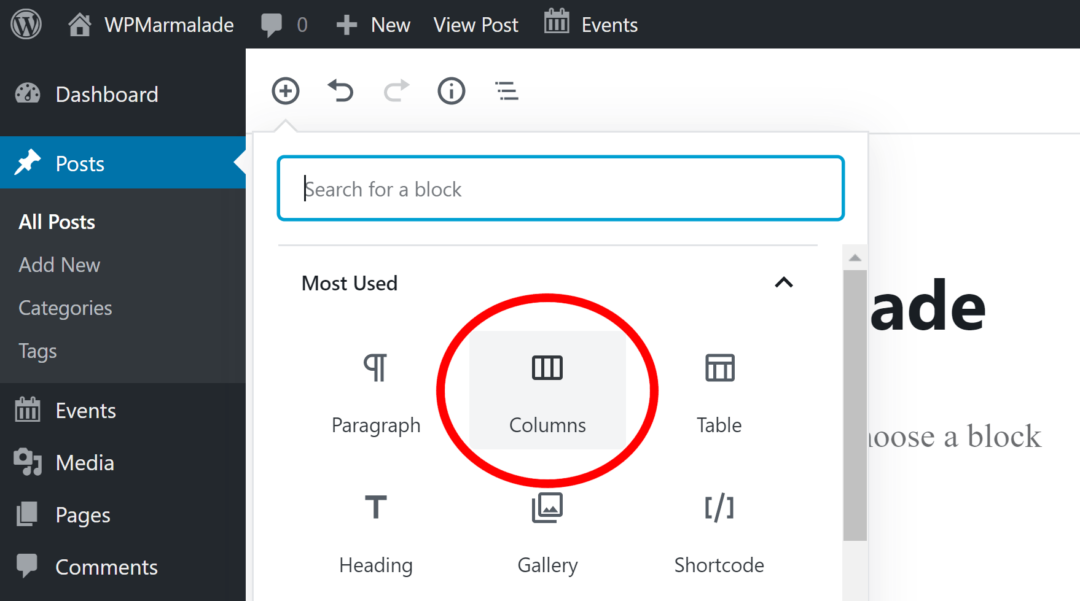
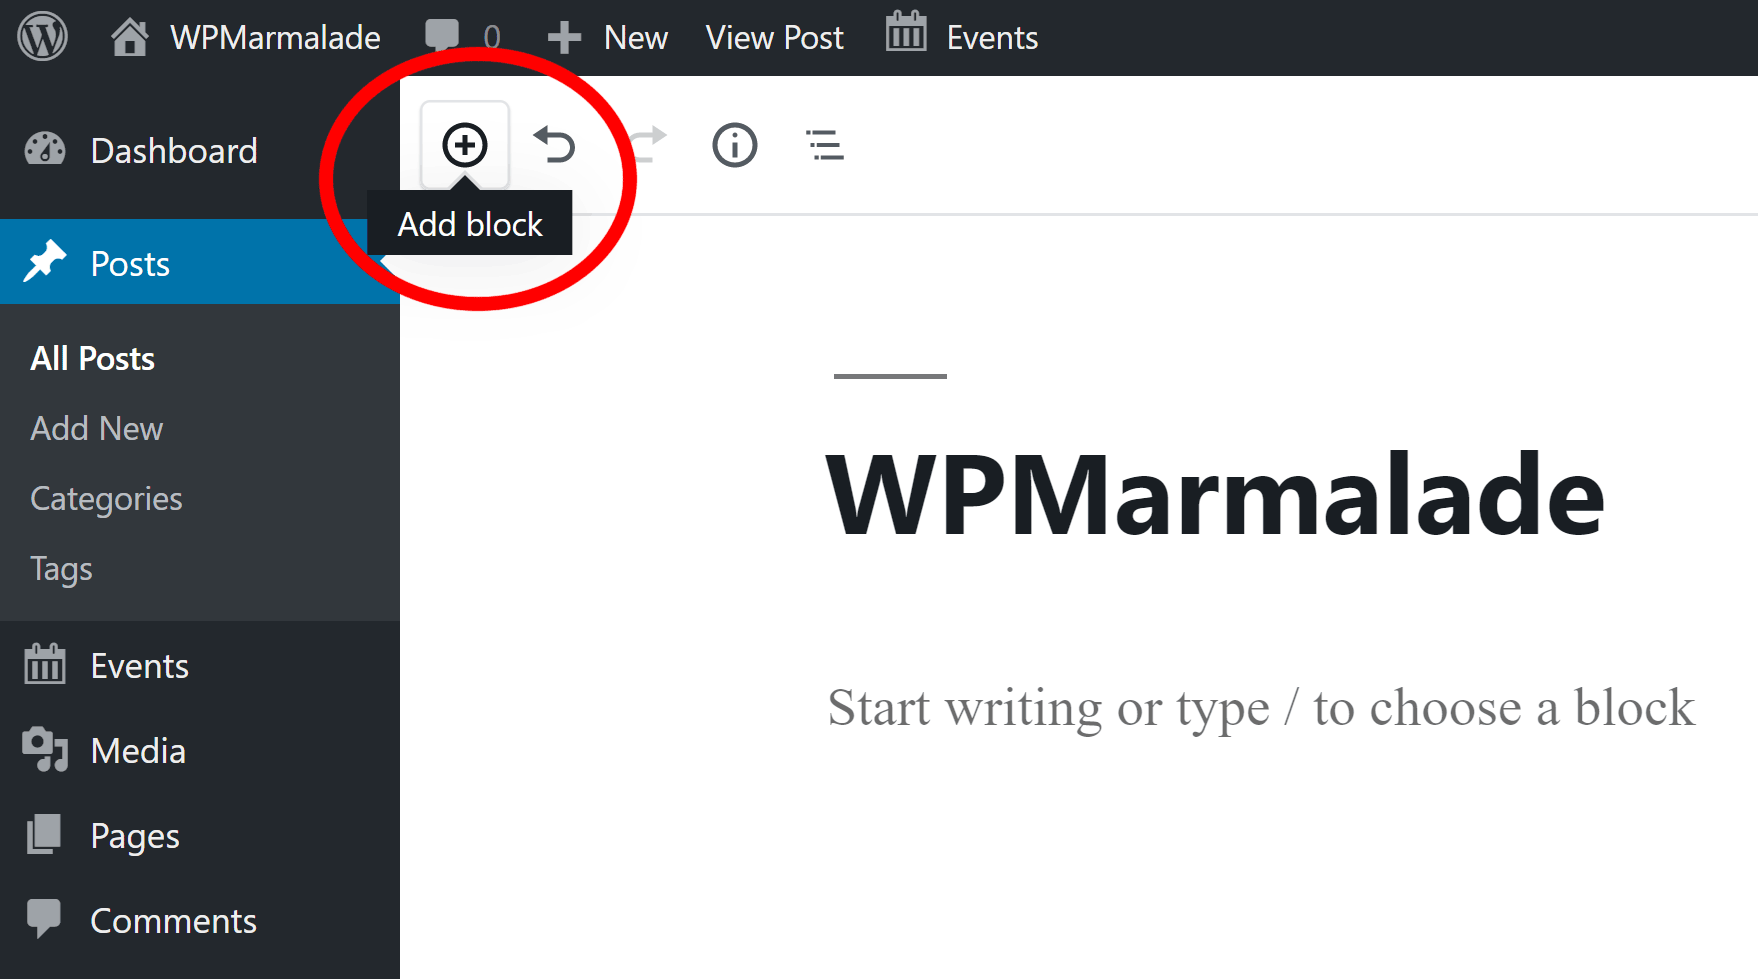
- Click on the “(+) Add Block” Button
The “(+) Add Block” button will load up all available content blocks on your website. You will find it at the top-left hand side of the WordPress editor.
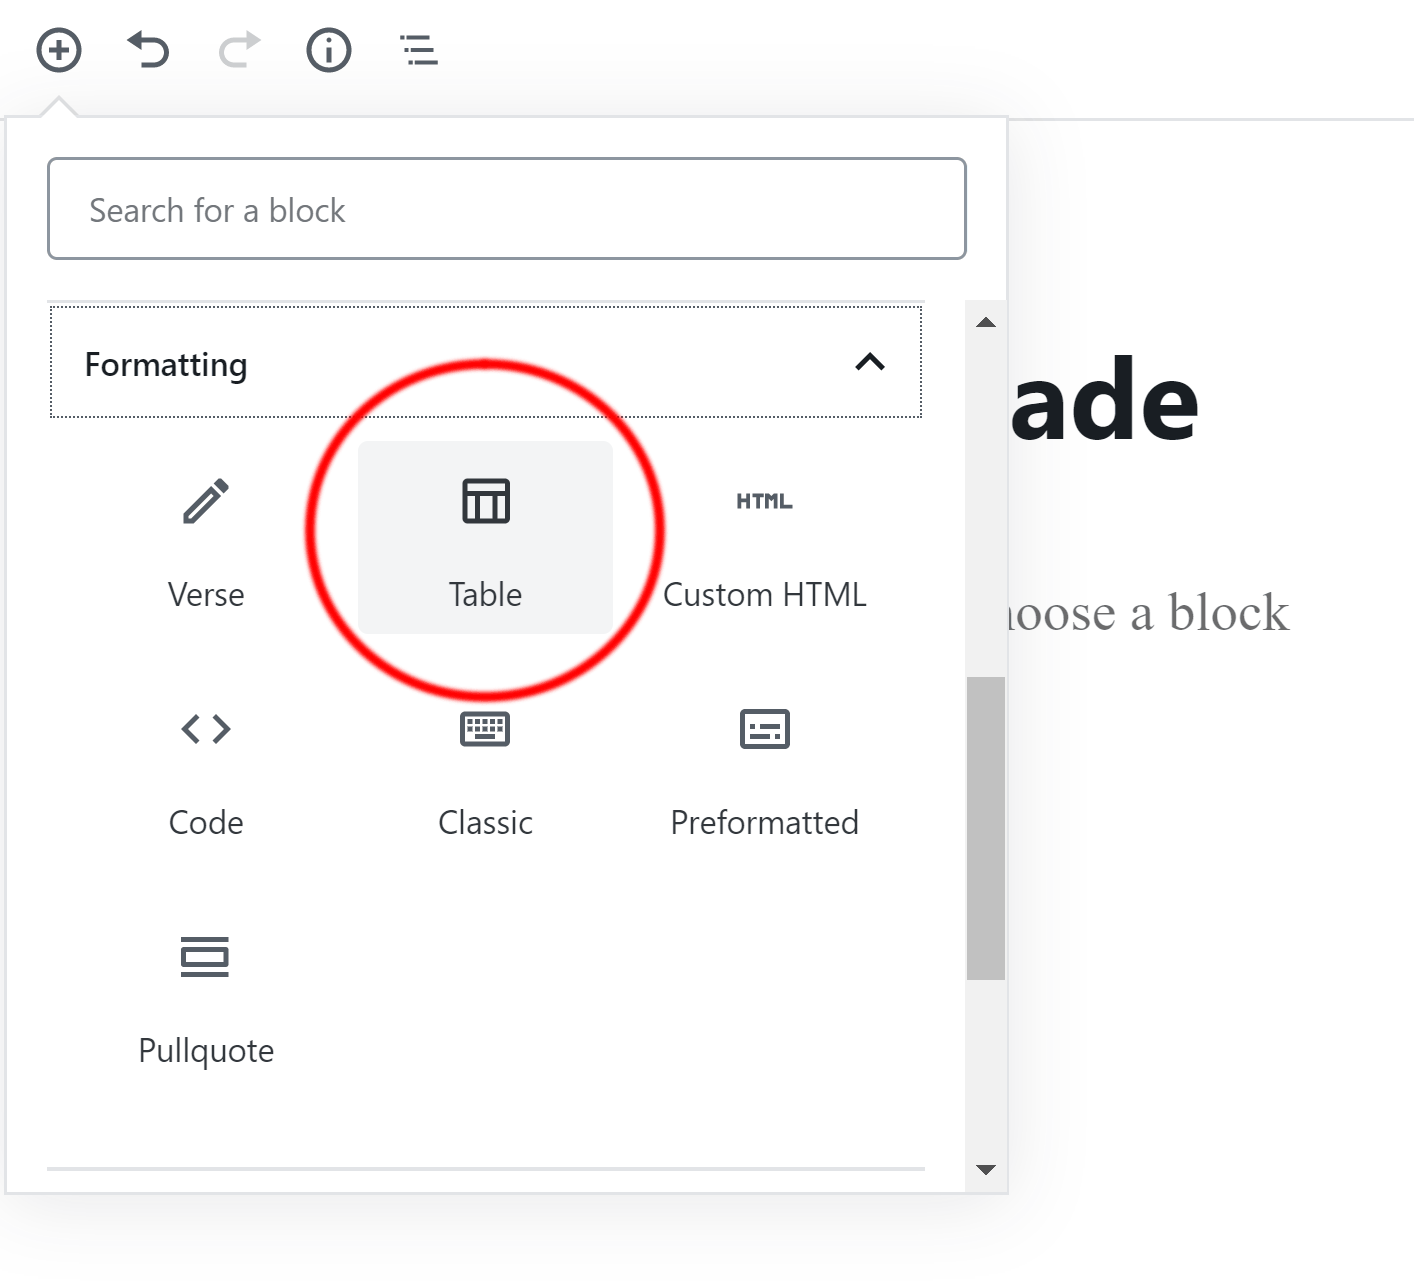
- Select the “Table” Block
Scroll down to the formatting section and select the “Table” Block. This will add a table to your post or page.
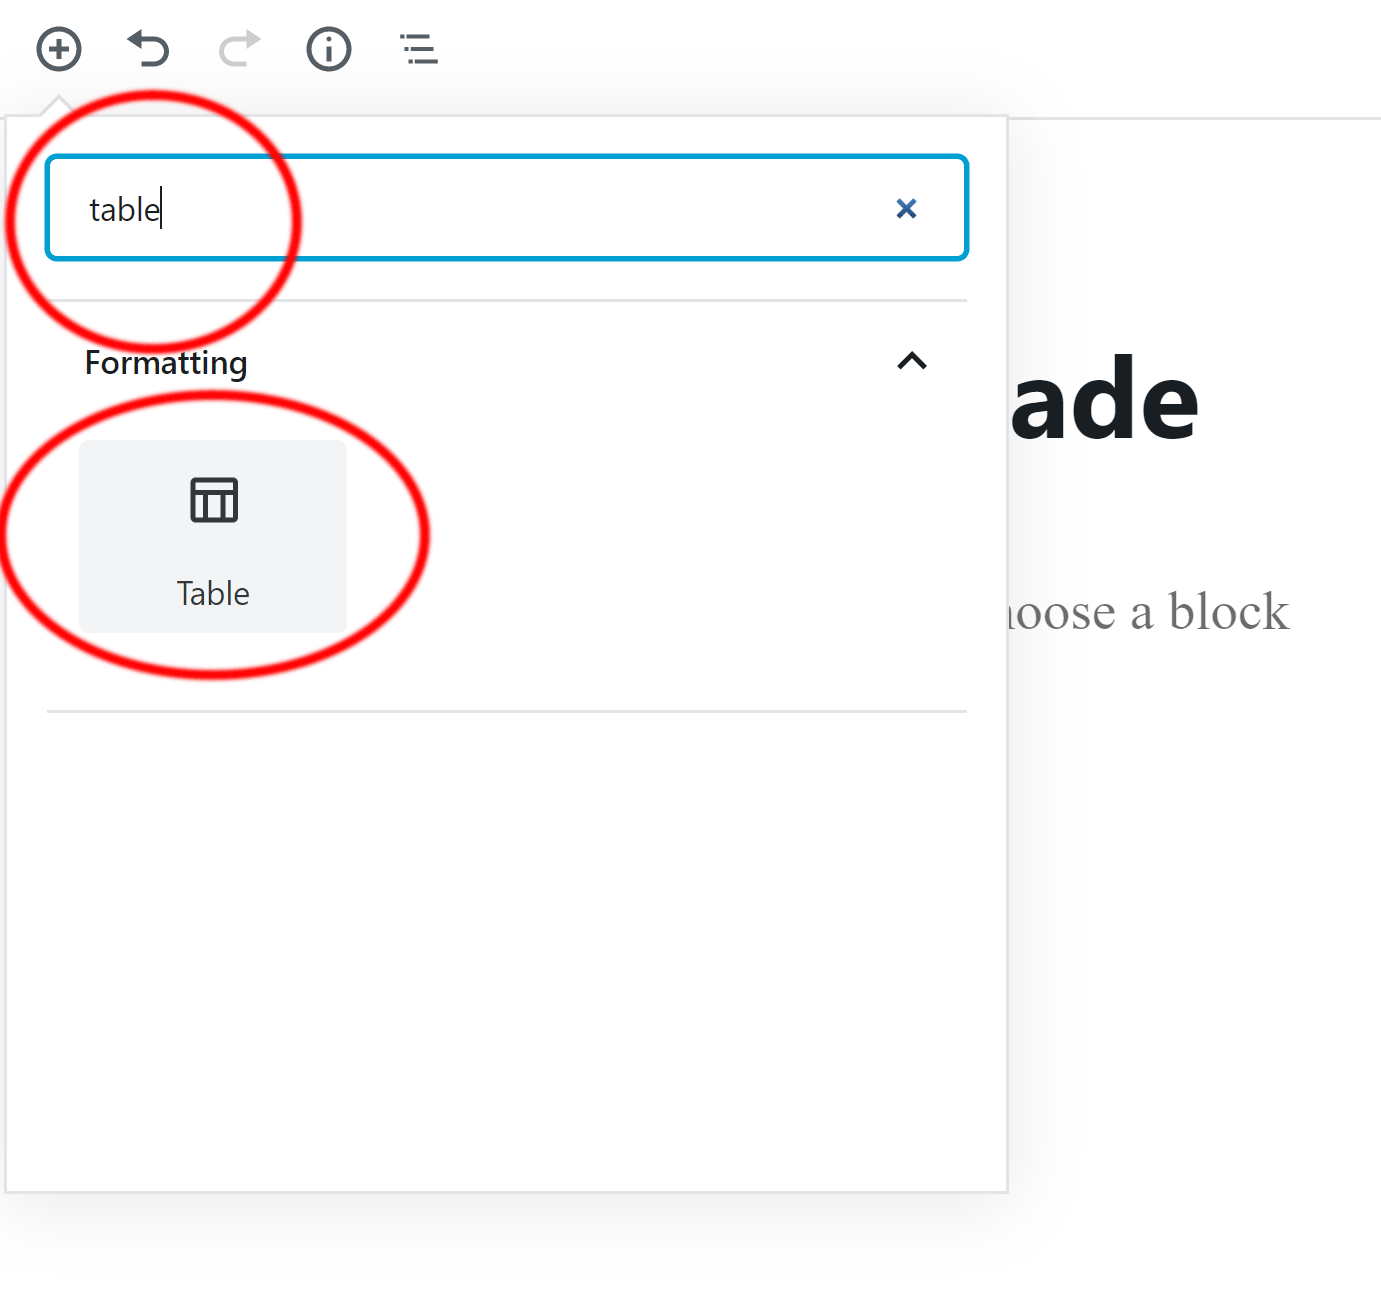
- (Optional) Search for the Table Block
If you prefer, you can find the “Table” block by searching for “Table” in the search box at the top of the block list.
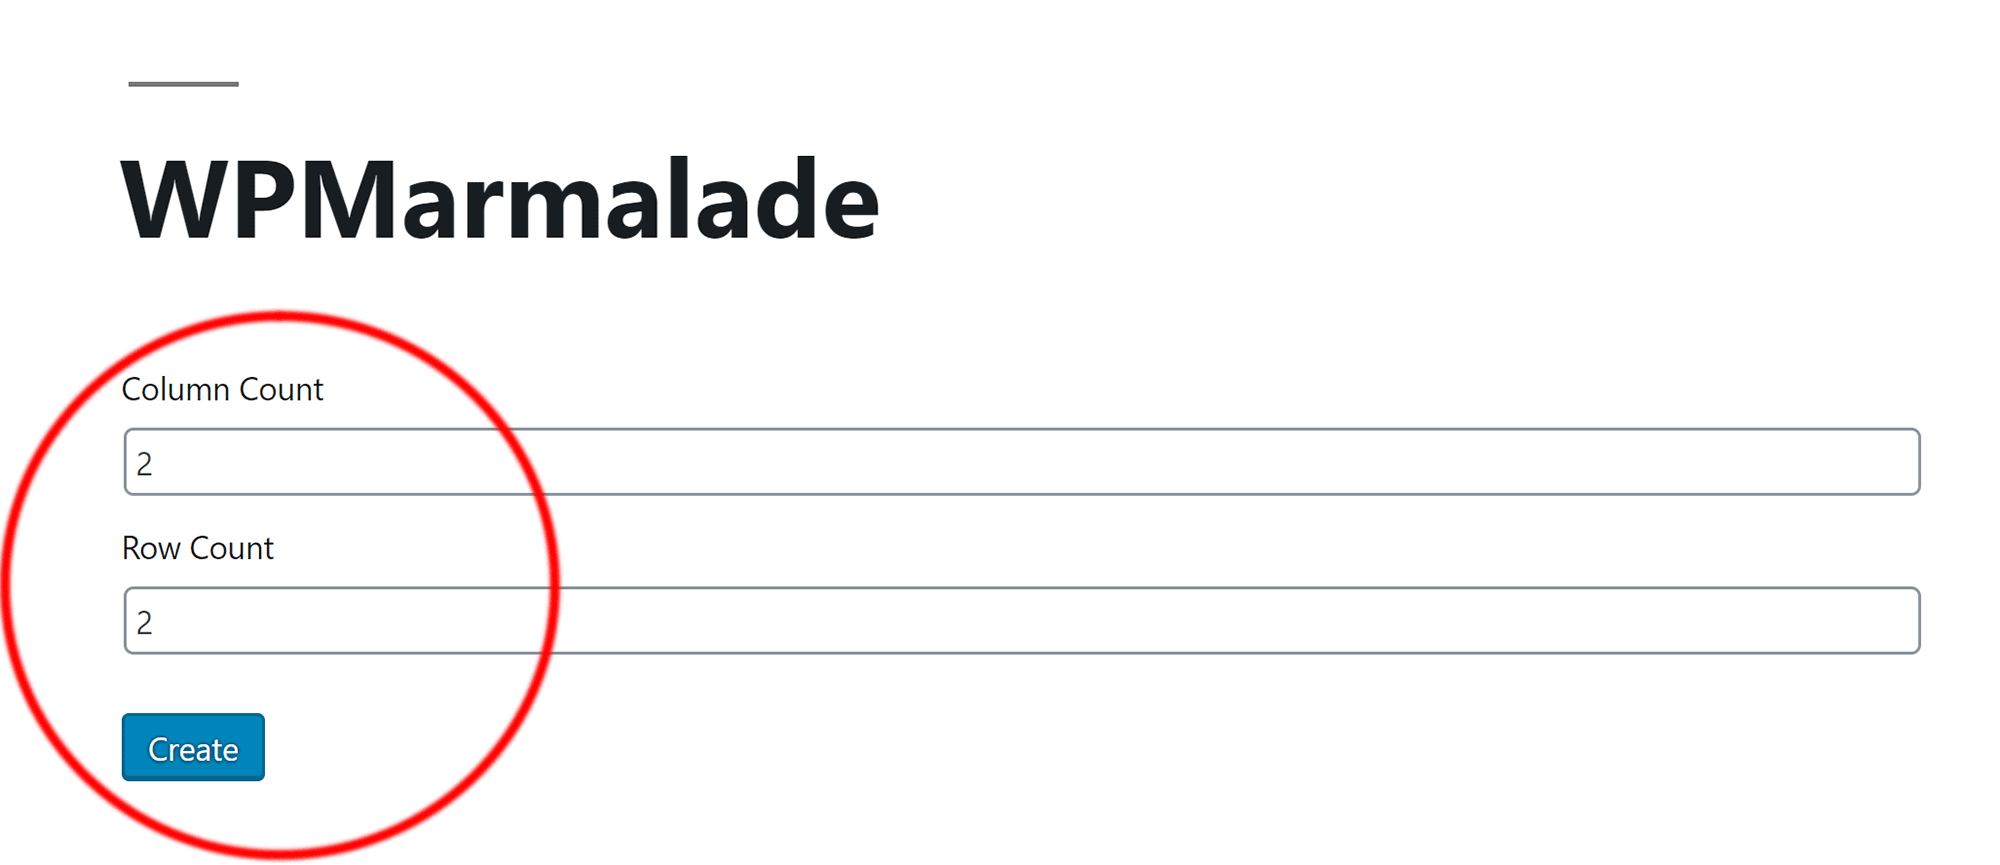
- Select the Number of Columns and Rows For Your Table
You will be asked how many columns and rows you need for your table. You can select any values you wish.
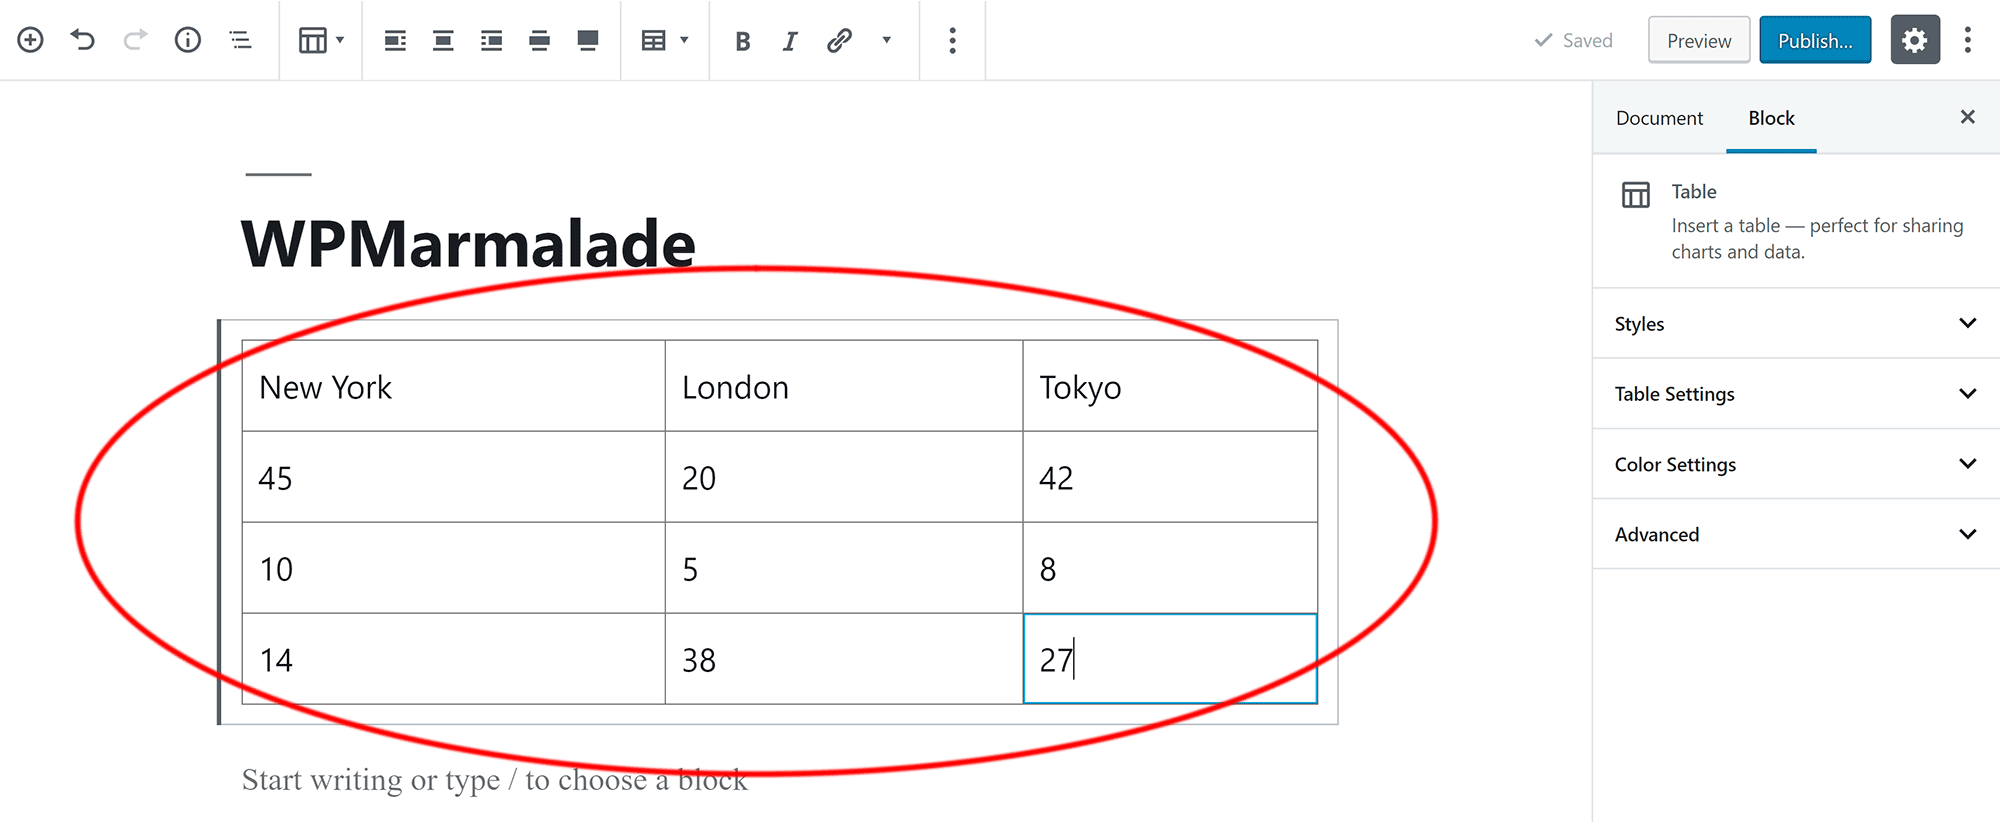
- Add Content to Your Table
You can now populate your table with data. All you have to do is click on a cell to modify it.
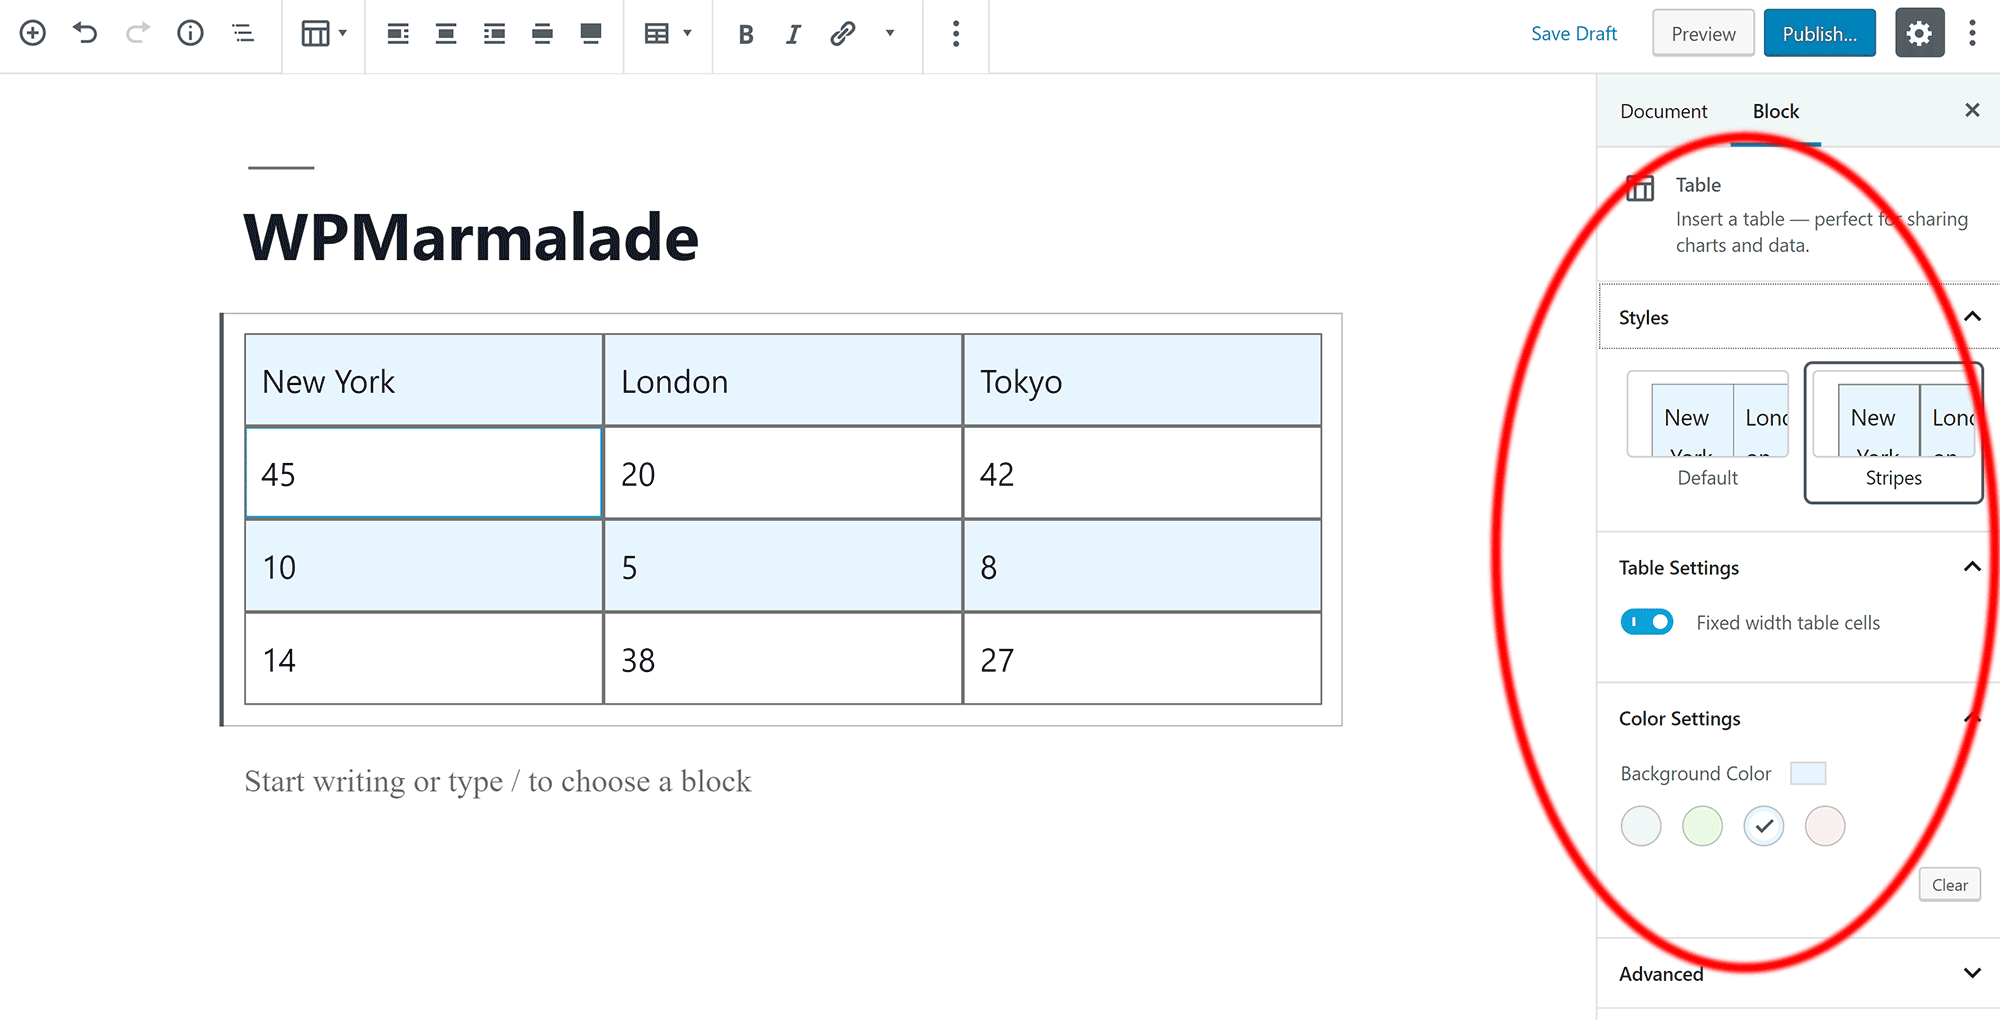
- Style Your Table
When the table block is selected, you will see various styling settings at the right-hand side of the page. These can really help bring you table to life. The “Stripes” style will display an alternate colour in your rows. In the field below you can make sure that all table cells have the same width. A background colour can also be applied to all cells. If the “Stripes” style has been selected, the selected background colour will only be applied to every second row.
Frequently Asked Questions:
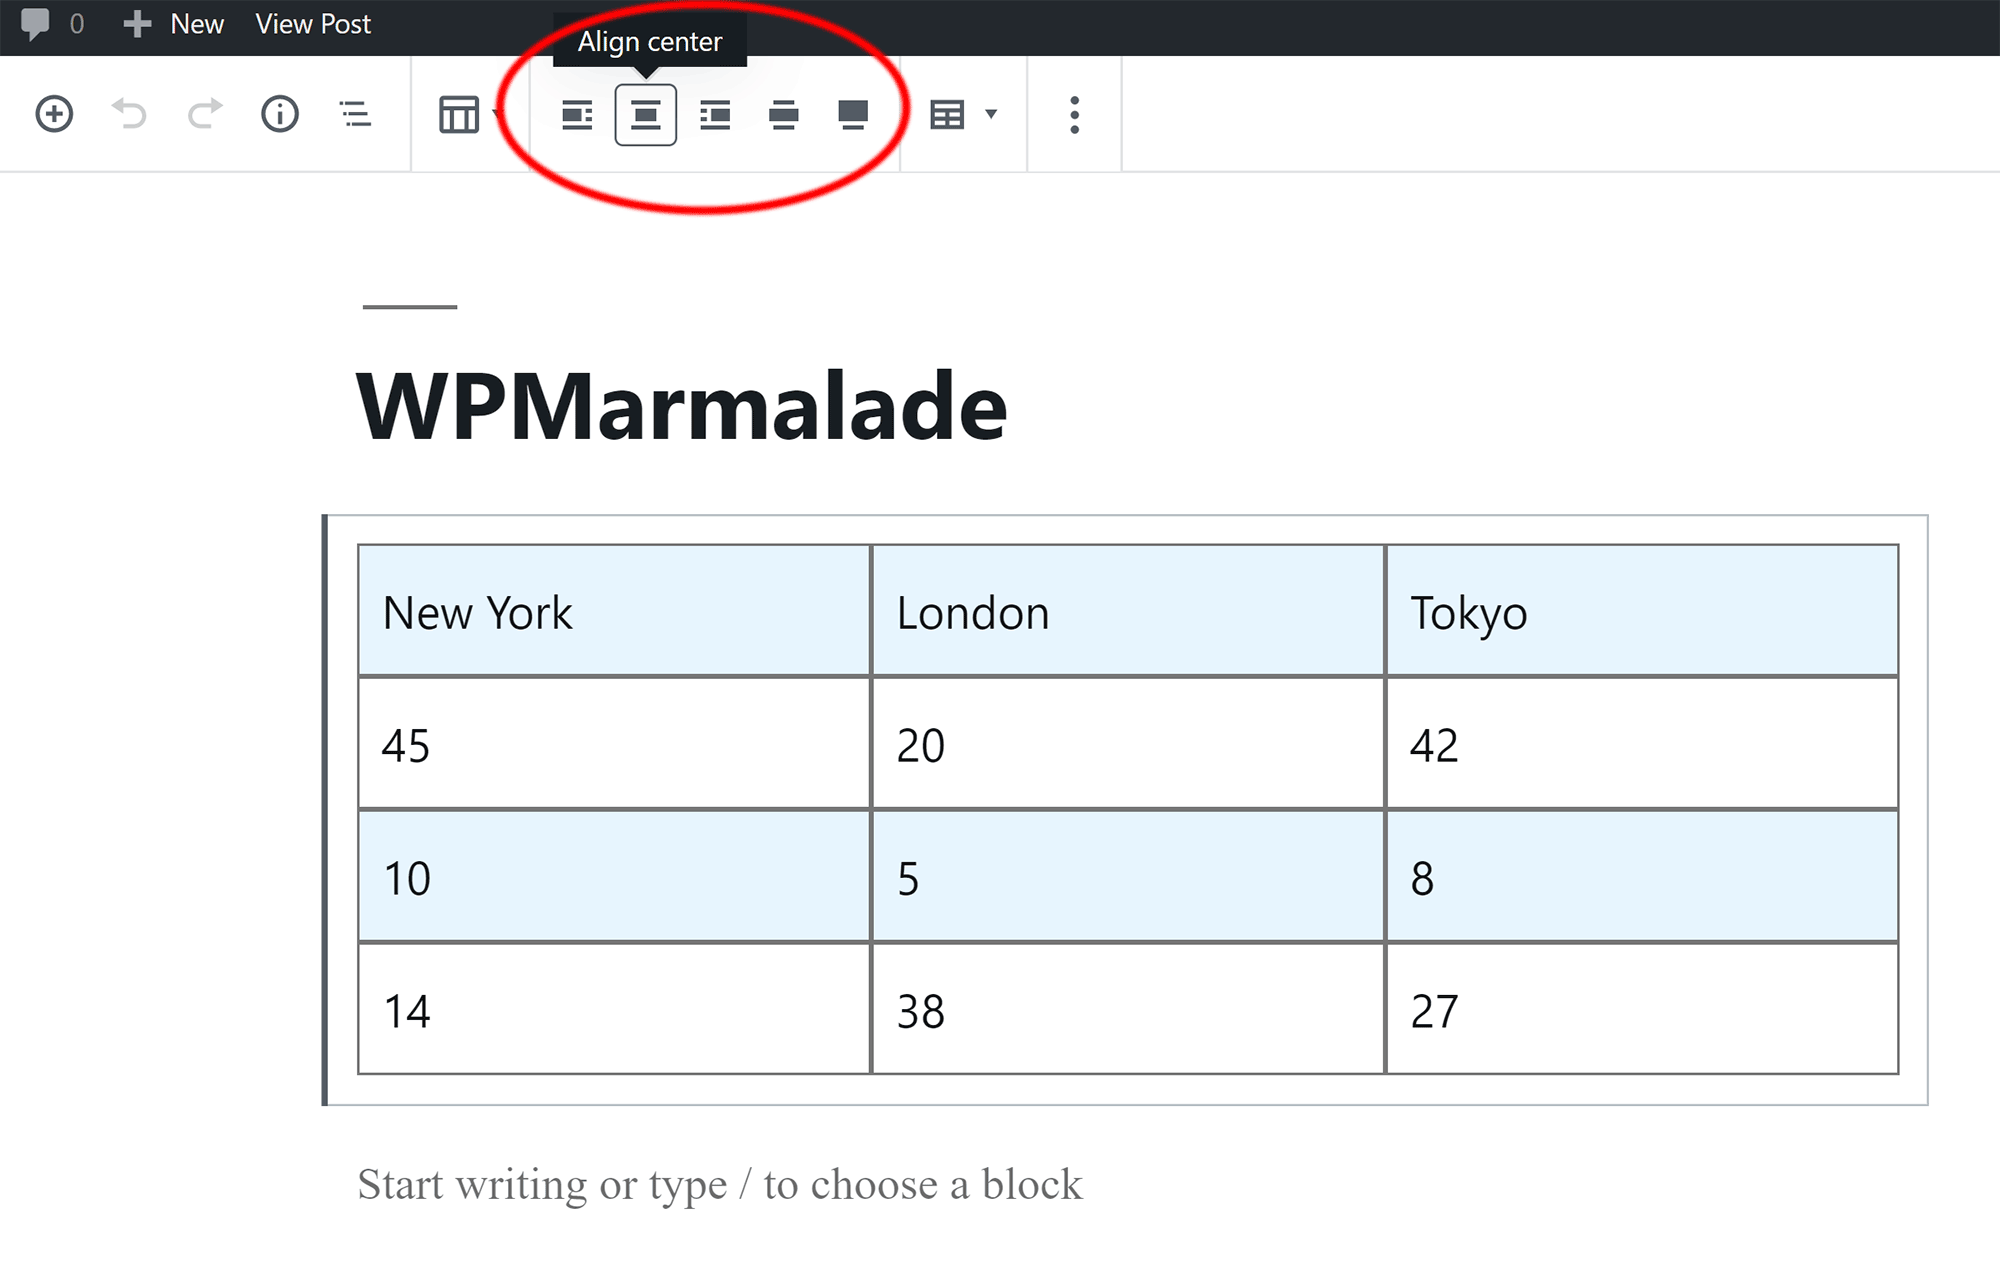
How Do I Align Tables and Change Table Width?
When the ‘Table’ block is selected, a row of formatting icons will be displayed at the top of the page. You can use these to adjust your table.
The five icons are: Align Left, Align Centre, Align Right, Wide Width and Full Width.
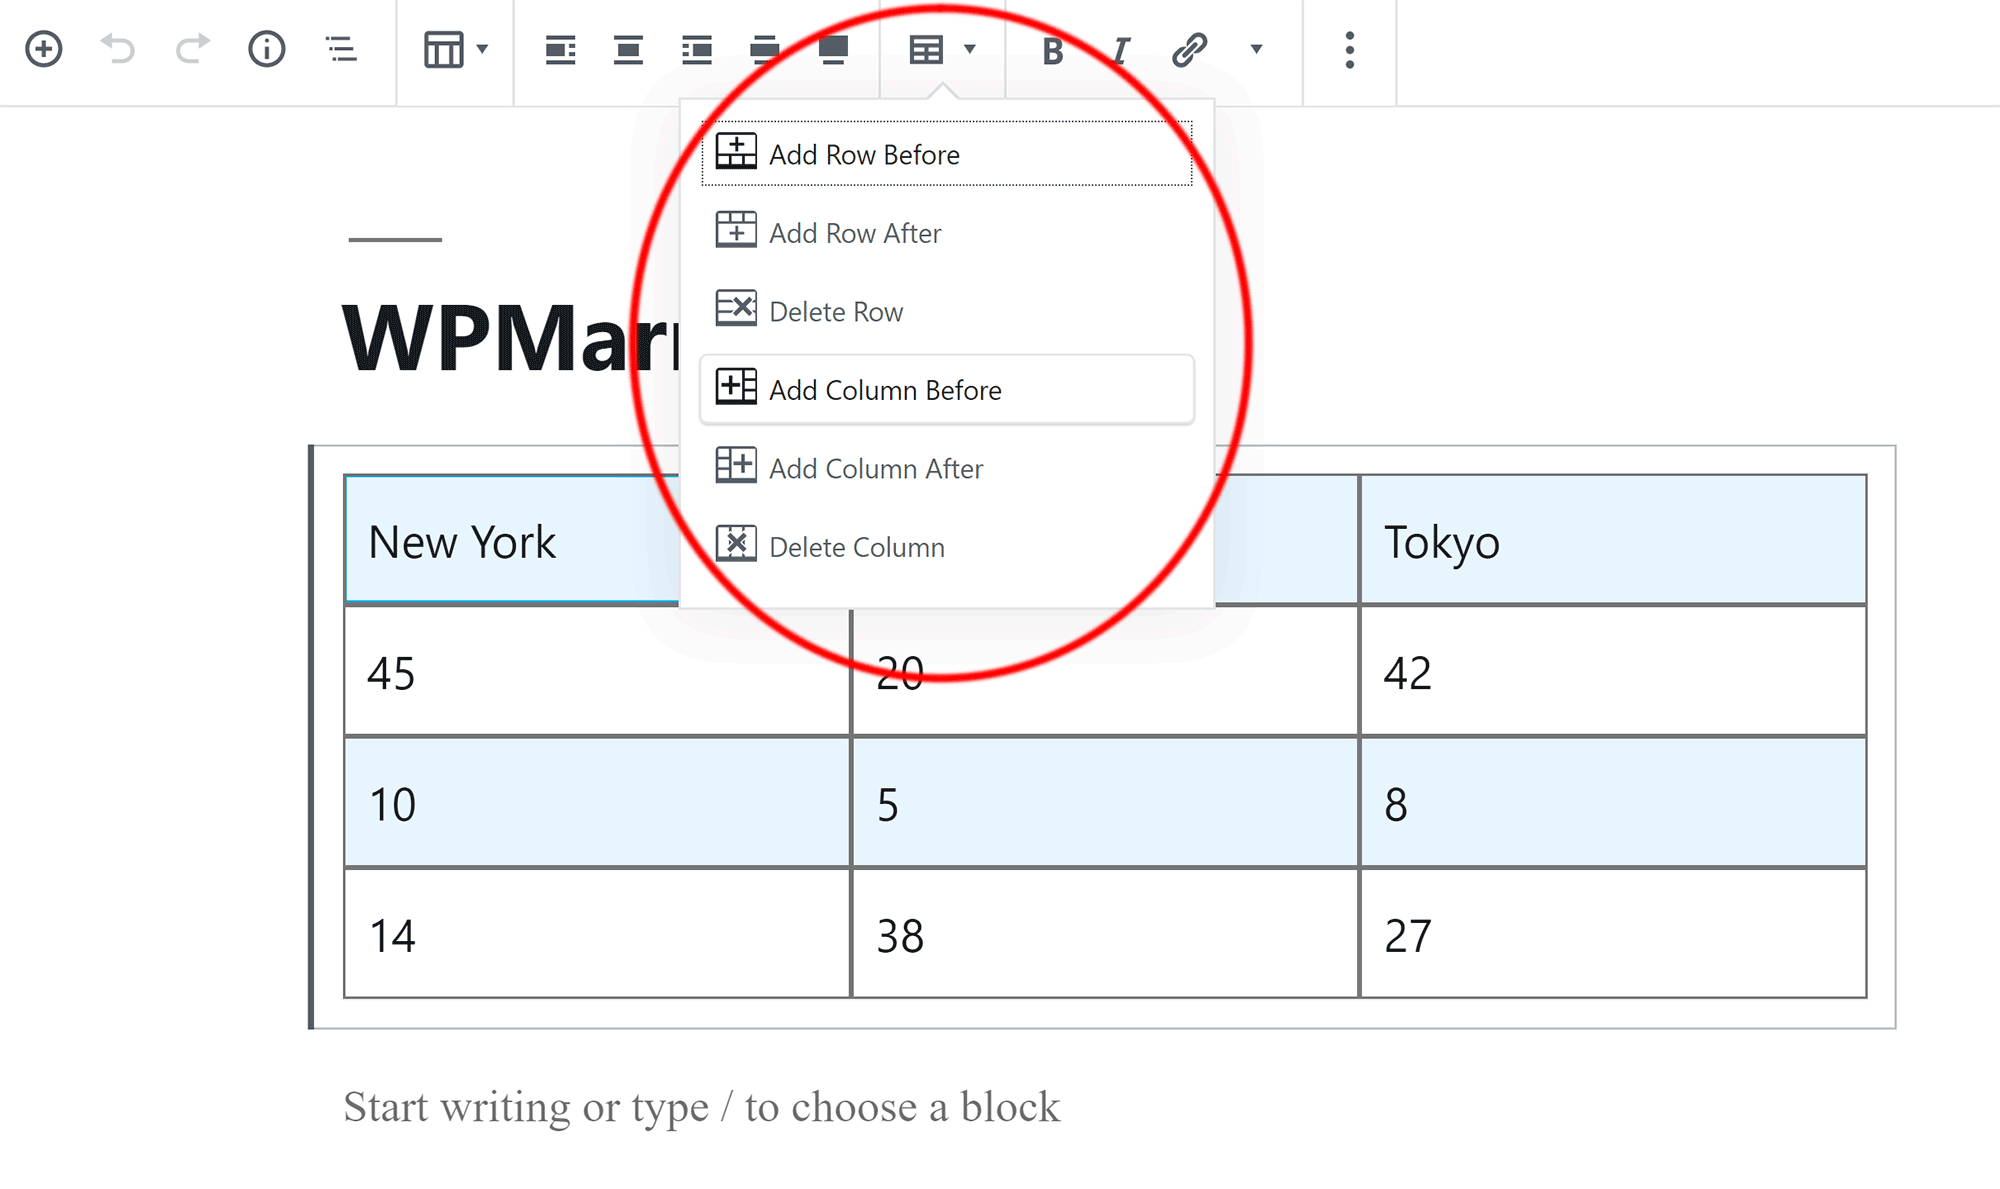
Can I Change the Number of Columns and Rows?
To the right of the alignment and width icons, which you’ll find at the top of your WordPress editor, is the ‘Edit Table’ icon. If you select a cell in your table and then click on this button, you’ll see six options for modifying your table.
You can use these options to insert rows and columns before and after the cell in question. Rows and columns can also be deleted from here.
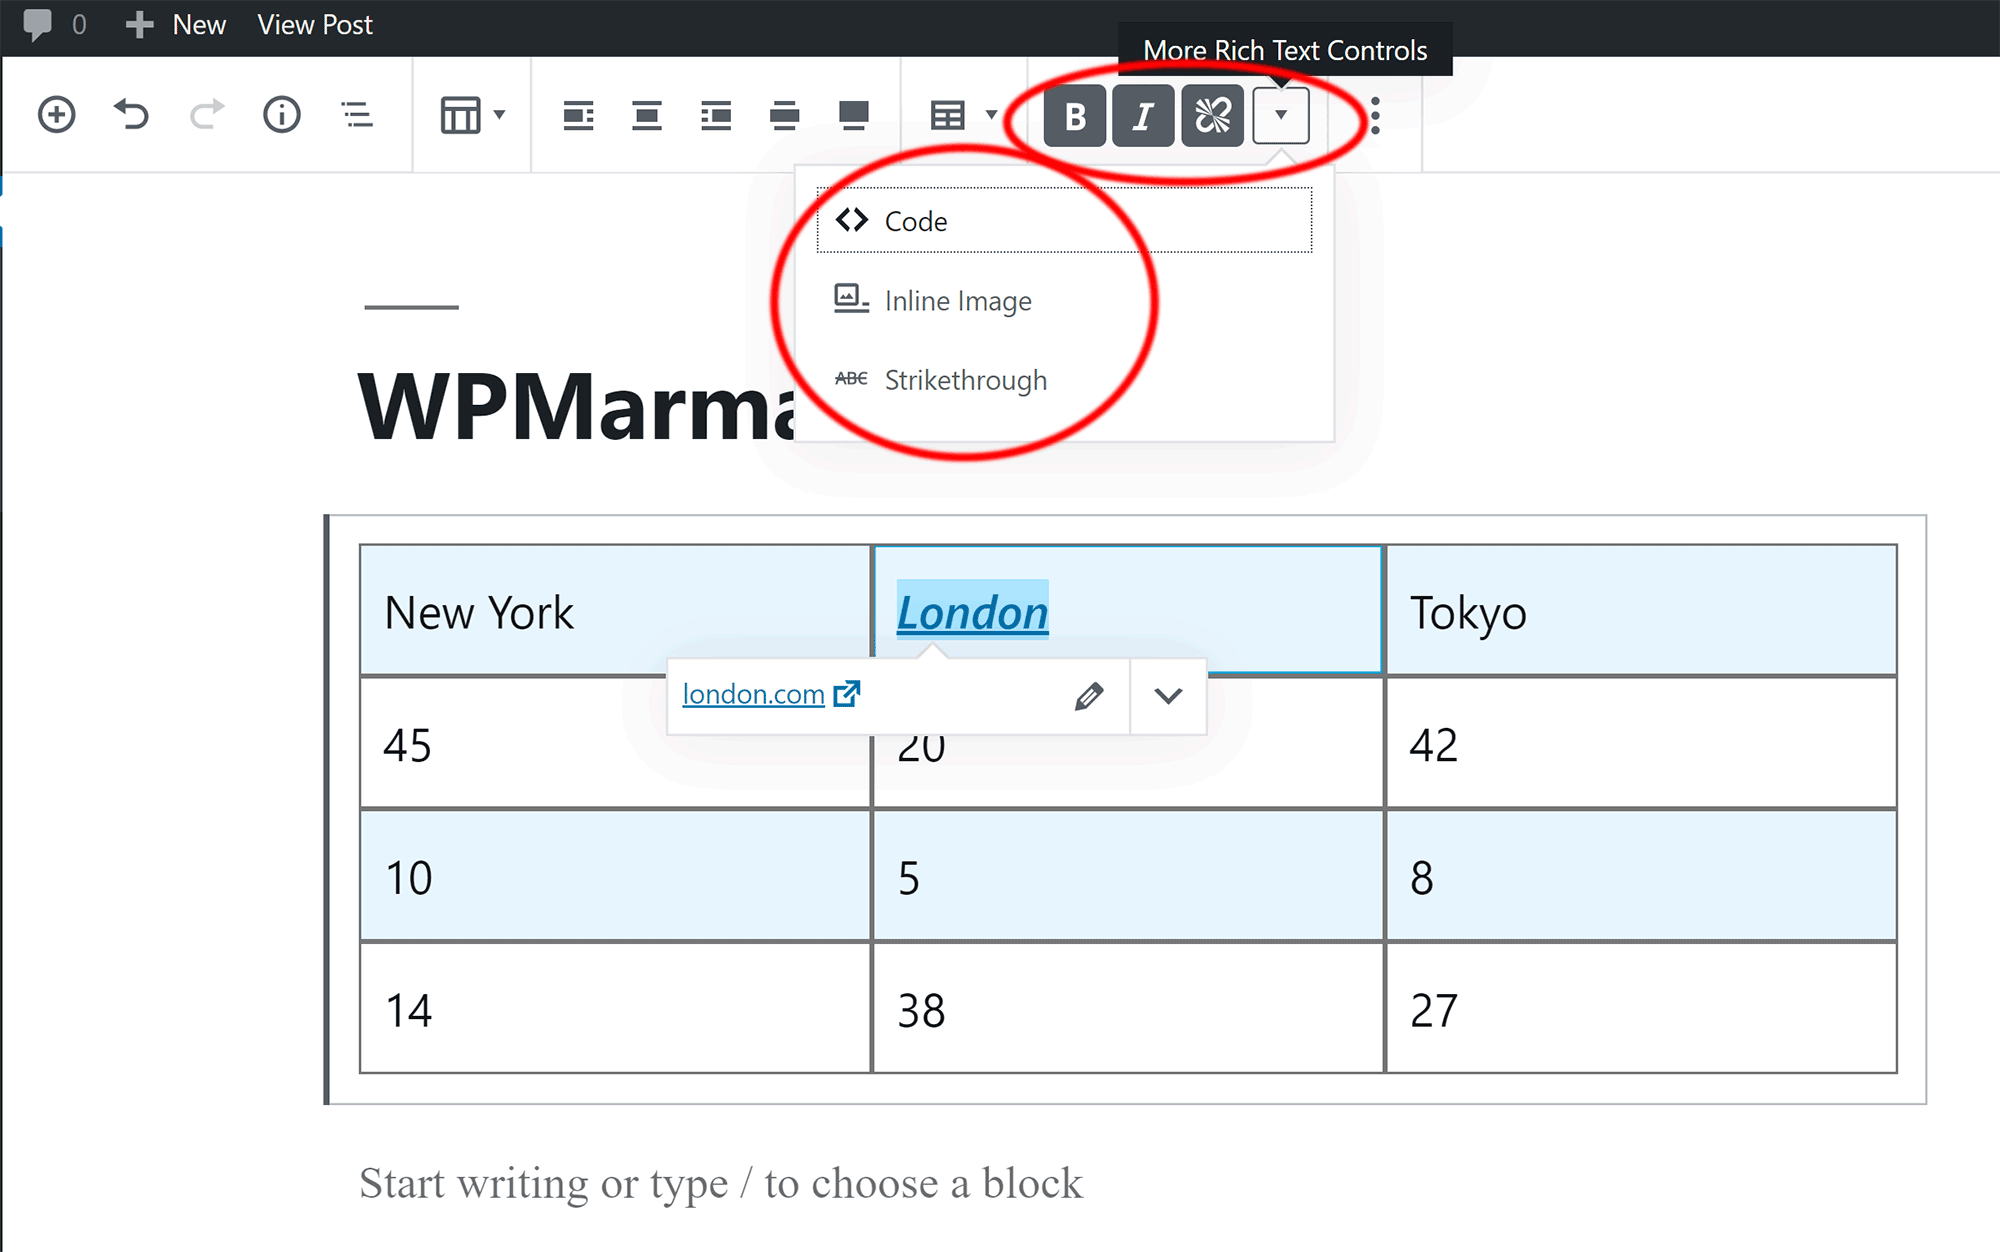
How Do I Format Cells?
The content you add to table cells can be modified easily using the formatting options at the top of the WordPress editor.
There are options to make text bold or italic, or link to a particular URL. Clicking on the drop-down menu icon will load options for code, an inline image and strikethrough.
Alternative Table Solutions
The WordPress table block is a fantastic way to insert simple tables into your WordPress posts or pages.
If you want to create advanced tables with more customisation and styling options, I recommend trying one of these WordPress table plugins instead.
See: Pretty painless! Any questions?